This post notes down the procedures to go through for setting up the connection to GitLab using SSH key so that we don’t need to bother with the login credentials, which, sometimes can be tedious due to firewall issues, etc. Here, I am using Unix-like OS for demo for the SSH key generation – on Windows, one can use the key generation tool that comes with software like PuTTy, MobaXTerm, etc. On a Unix/Linux terminal, execute ssh-keygen to generate the rsa key pair and we need to following the prompt to give a name to the generated key file. When asked to enter a passphrase for the key file, we can just press [Enter] to continue without any input. Assume we put my_key_file as the key file name, the process above will create two files – my_key_file and my_key_file.pub – the former one is the private key, which we want to keep to ourselves, and the latter one is the public key which we can post to the machine that we want to connect to.
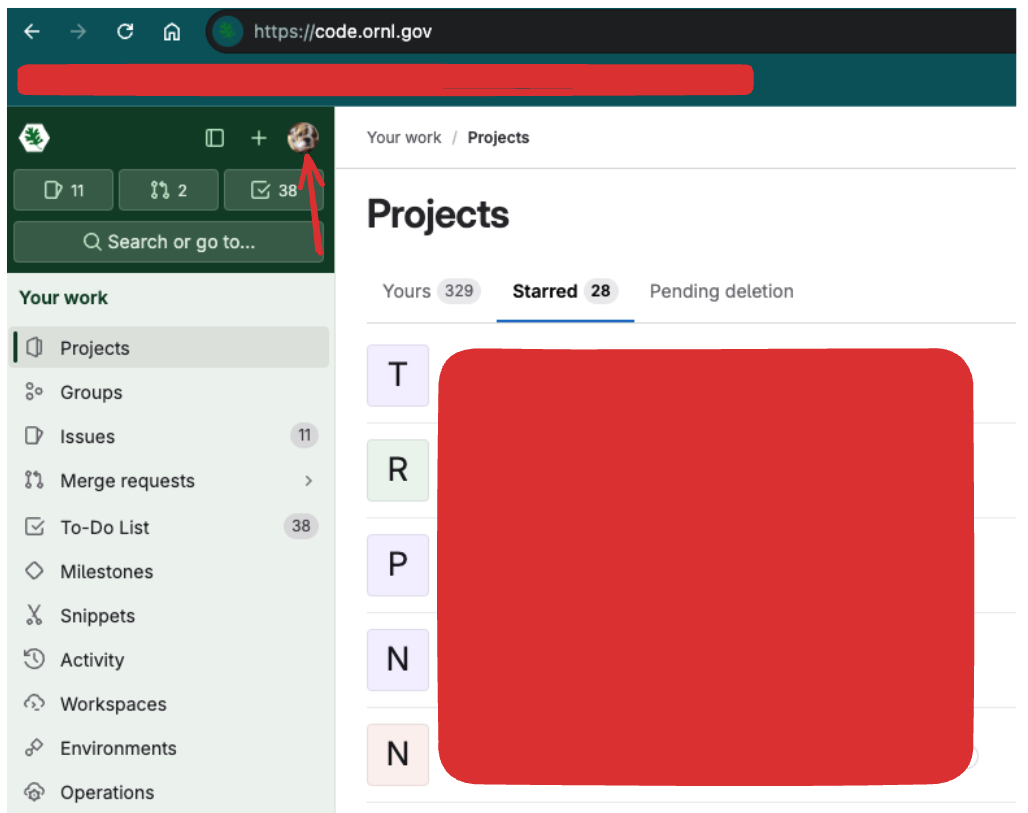
In this case, we want to post the public key to our GitLab server so that we can use our private key to establish the secure connection to the GitLab server. To do this, we first go to the GitLab server via the web browser, e.g., https://code.ornl.gov. Once logged in, we can click on our avatar icon as shown below,

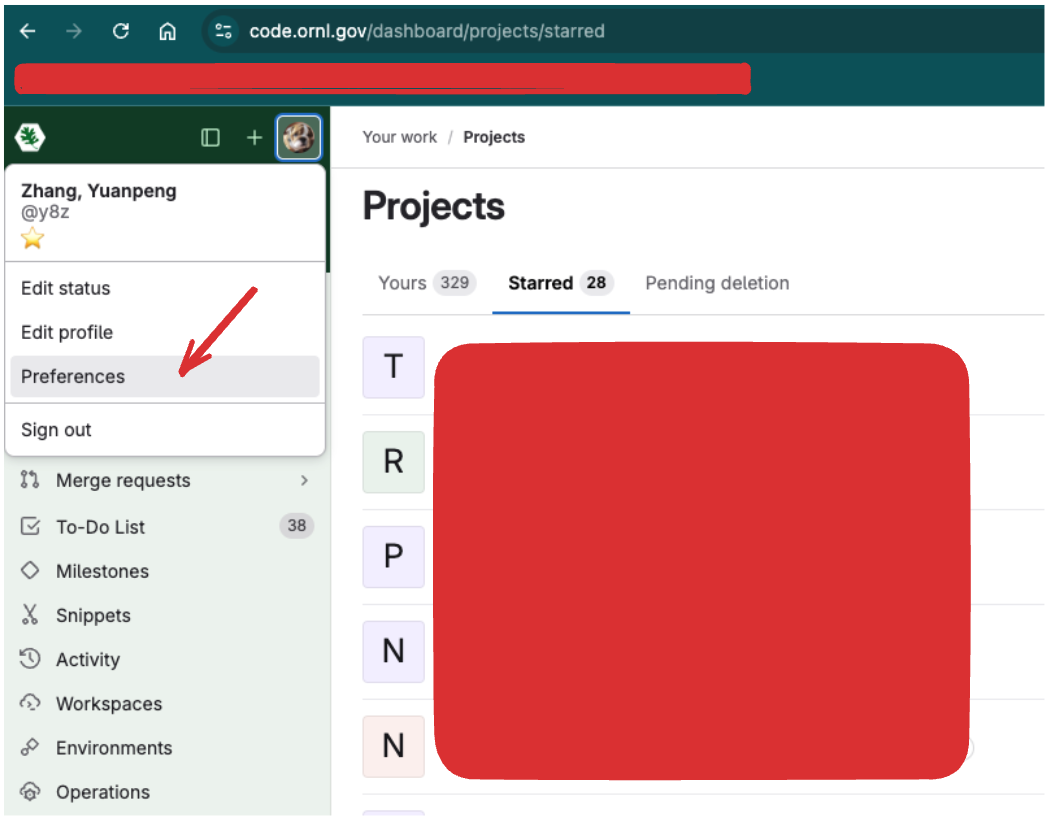
to bring up the profile setting menu, followed by clicking on the Preferences as shown below,

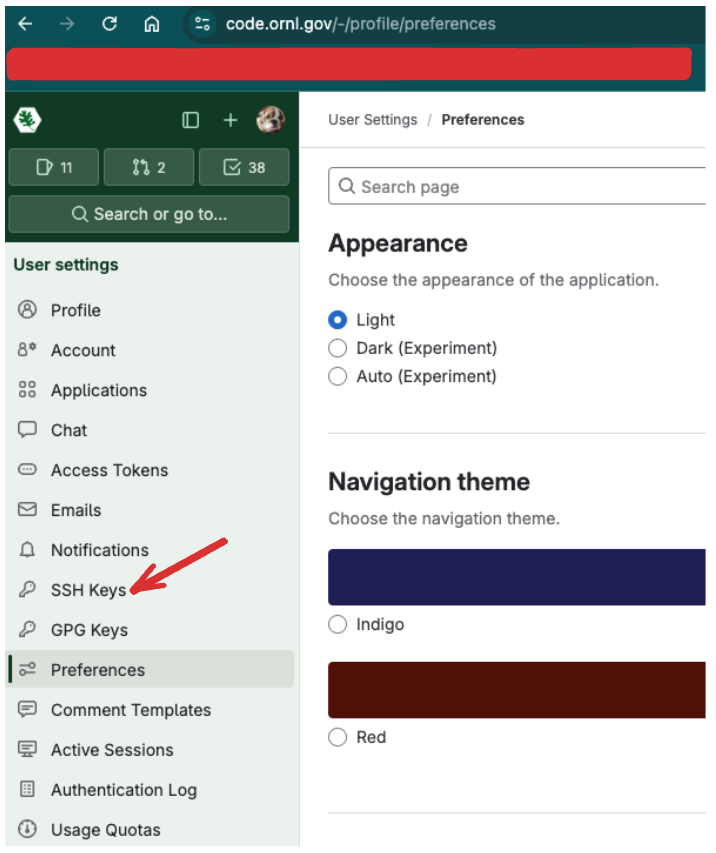
Then in the left-side menu, we click on the SSH Keys item, as shown below,

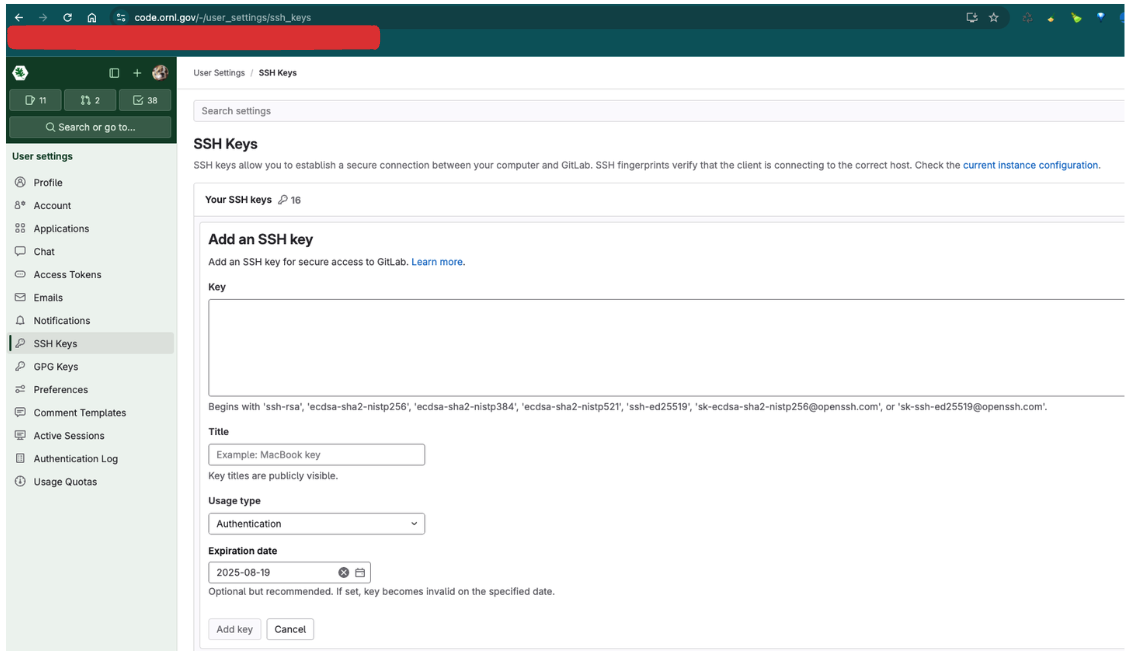
which will bring us with the SSH Keys interface,

There, we click on the Add new key button as shown in the picture above. Then we paste the contents of the my_key_file.pub file that was generated previously, into the Key box as shown below,

Then we give it a title, assign the usage type (e.g., Authentication) and give it a suitable expiration date, followed by clicking on the Add key button at the bottom so that our public key will be added to the GitLab server.
Next, we go to the repository that we want to work with, from the web browser, and we want to find out the SSH connection address for the repo – we can find the address by clicking on the Code dropdown menu in our repo as shown below,

Copy the address and we will use it together with the SSH key we set up earlier to establish the secure connection. In my case, the full copied address is, git@code.ornl.gov:general/tsitc.git and I will use this as an example for next step of demo. Next, we go to the terminal on our local machine, and we want to edit the ~/.ssh/config file (~ on Unix/Linux terminal represents the user home directory) to put in the following contents,
Host ornlgit
    HostName code.ornl.gov
    User git
    IdentityFile ~/.ssh/my_key_file
where ornlgit is an arbitrarily unique name that we assign to the GitLab server. The User has to be literally git, and the identity file refers to the private key file that we generated earlier.
Once the preparation work is all done, suppose that we want to clone my example repository mentioned above, we want to do this on terminal,
git clone ornlgit:general/tsitc.git
where we have replaced git@code.ornl.gov in the originally copied address with the unique name ornlgit that we assigned to the GitLab server in our local SSH configuration file. From now on, we should be able to use git within the checked out repo without the need to worry about login, etc., as the connection has already been established in a secure way using the SSH key.
For Windows
On Windows, we need to use the git terminal – if we follow the instruction here to install the Windows version of git, we will have access to the git terminal. Inside the git terminal, we can edit the ~/.ssh/config file to put in the host configuration mentioned above just like what we would do on a Unix/Linux machine. Using git through Windows terminal like powershell or CMD will probably work with the SSH key, but I am not sure how for the moment and will leave it for further exploration.