
One can follow Ref. [1] to build up site with Jekyll - it contains quite a few steps concerning the set-up of sites through GitHub pages. However, this is not necessary if one just wants to set up site locally and test. Therefore, after installing Ruby and Bundle, one can directly create a local folder and go into it. From there, one needs to follow the steps given below,
1. Run bundle init - this will create the Gemfile.
2. According to Ref. [1], GitHub pages depends on certain version of packages (a link can be found there in Ref. [1] about details) and therefore one may need to install certain version of Jekyll with Bundle (though, again this may not be necessary if one only wants to do it locally). To install a certain version of Jekyll with Bundle, one need to put in the following line into Gemfile,
gem ‘jekyll’, ‘3.9.0’
3. Then one needs to execute bundle install to install the required version of Jekyll.
4. At this stage if one continues, as instructed in Ref. [1], to execute bundle exec jekyll new ., most likely error will occur, complaining that the directory is not empty (since we created the Gemfile in previous step for installing the right version of Jekyll). In this case, one just executes the following command, bundle exec jekyll new --force ., which will by force overwrite the already existing Gemfile.
5. To test locally, one simply executes the following command, bundle exec jekyll serve to start the service, where one should be able to see the localhost that we need to open in browser to check our template site!
More reference materials can be found in Refs. [2-4].
Typical issues - 1
Load error: cannot load such file – webrick
Solution
Run the command, bundle add webrick.
Google search indexing for our website
-
First we need to generate a sitemap.xml for our website. To do this, we can following the instruction provided in Ref. [5]. Basically, we need to manually generate an
sitemap.xmlfile under the root directory of the Jekyll site. Then either runningbundle exec jekyll serveto build the website locally or pushing the codes to GitHub where the whole website will be generated automatically, the fullsitemap.xmlfile will be automatically generated under the_sitedirectory, according to the template we provided in the originalsitemap.xmlfile (under the root directory). As a reference, we could refer to templatesitemap.xmlavailable here for current website (built with Jekyll and hosted on GitHub pages). -
Once the
sitemap.xmlfile is available on the website, e.g., athttps://iris2020.net/sitemap.xmlfor current website, we can go to the Google Search Console, and add a property for our website (if it is not already existing),
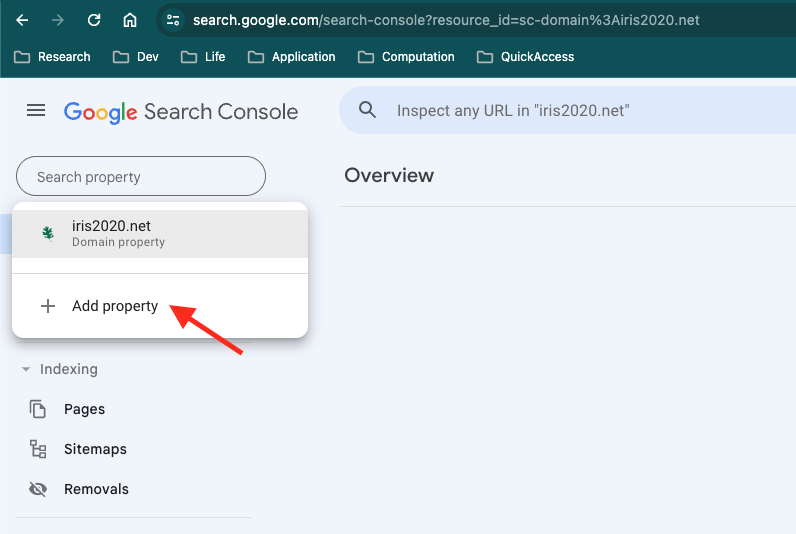
- Once the property for our website is created, select it from the top-left corner
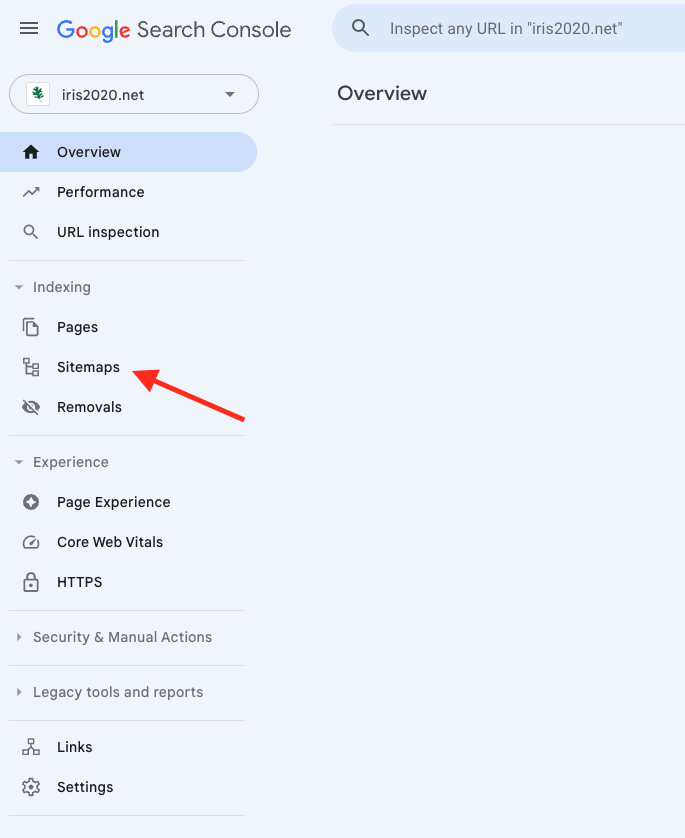
dropdown menu as presented in the image above. Then we go to
SitemapsunderIndexingin the option list on the left,
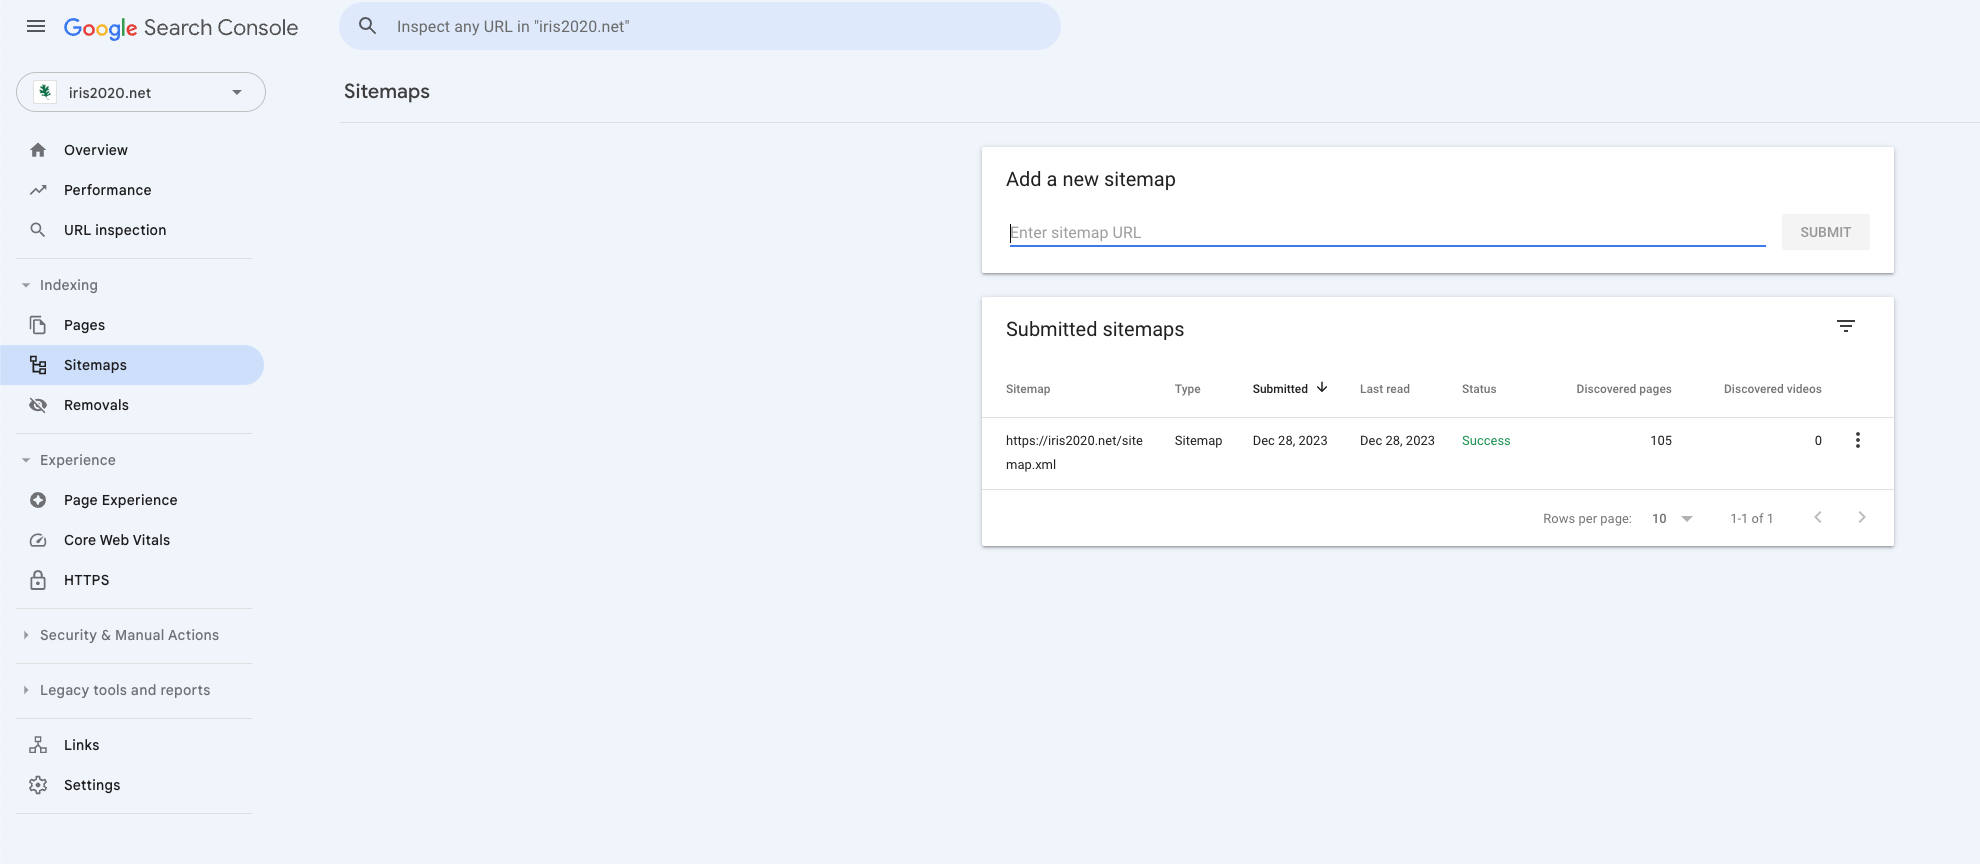
- Here we can add in the full URL to the sitemap of our website, e.g.,
https://iris2020.net/sitemap.xmlin the input box on the top, if the sitemap is not already added (we can see a full list of submitted sitemaps),
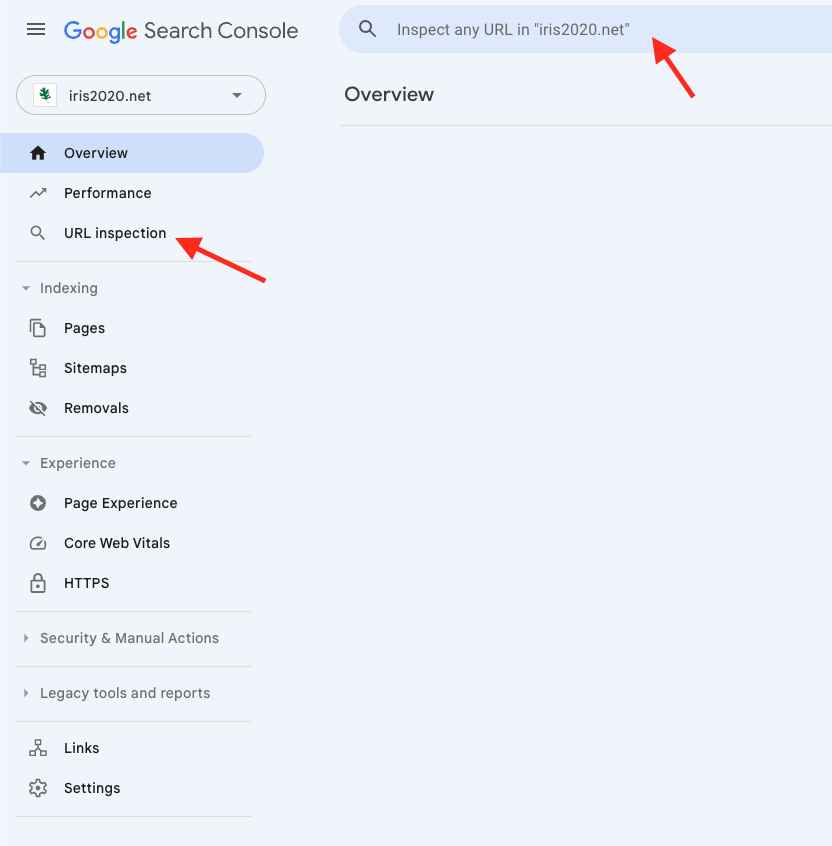
- Then, we want to submit the request for Google to (re)crawl our website, by going to
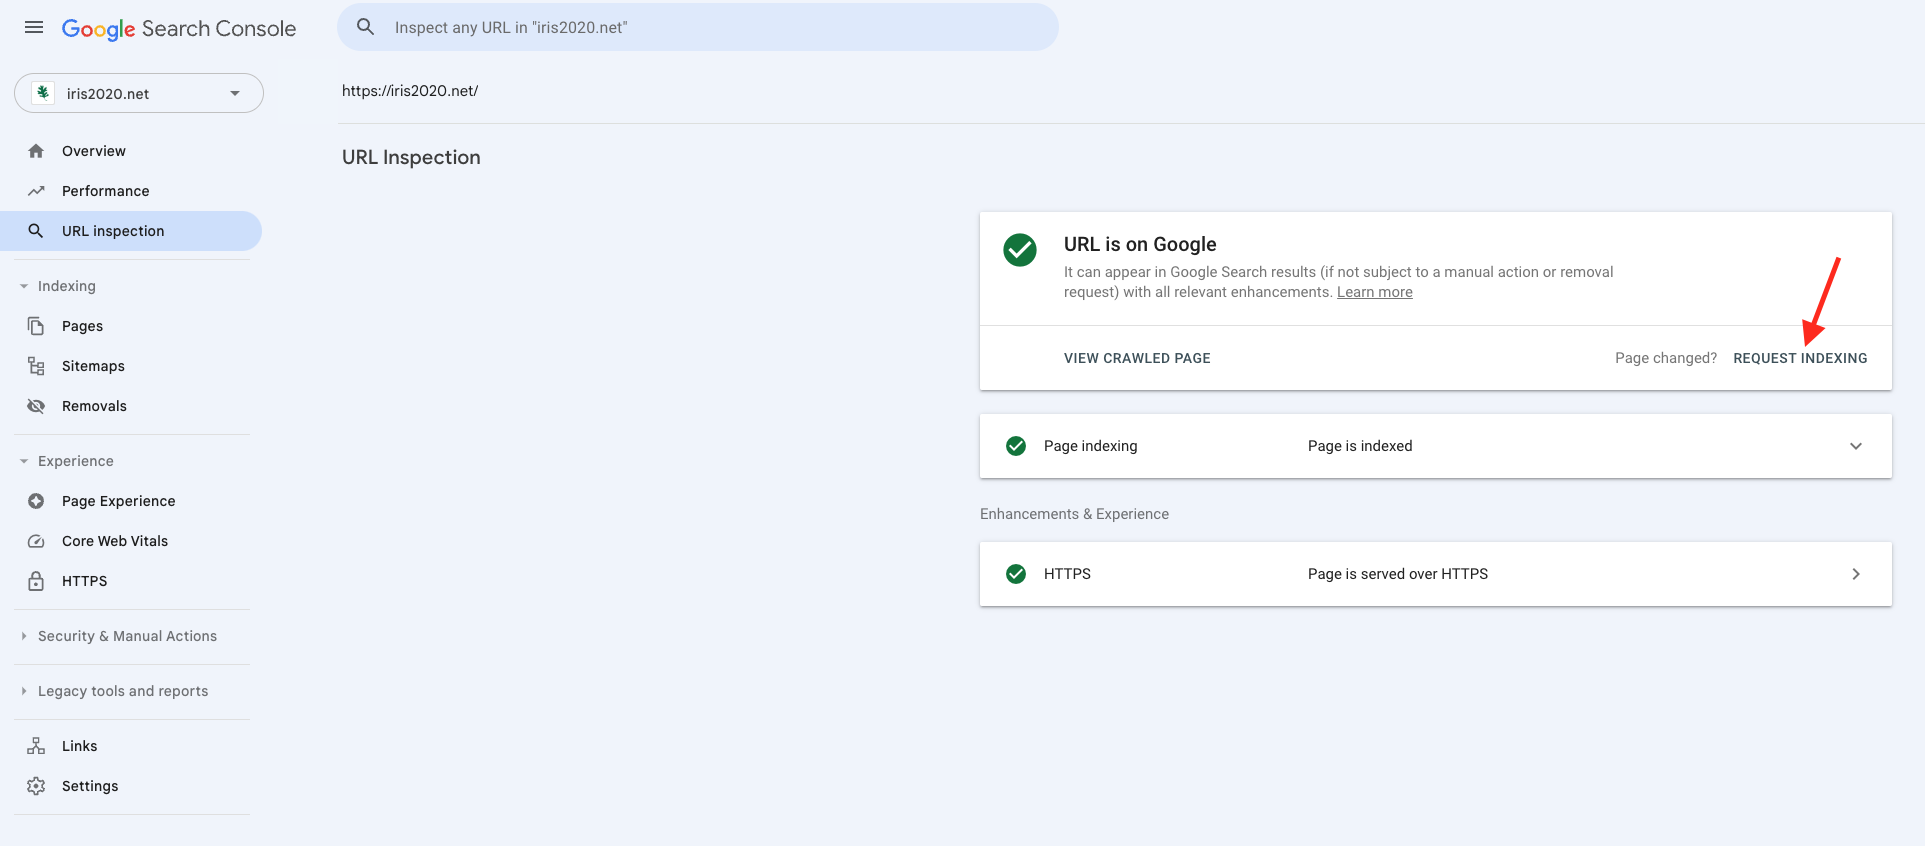
URL inspection(on the left of the console) and put in the URL of our website in the search box on the top,
- Finally, we want to click on the
REQUEST INDEXINGto submit the (re)crawling request to Google and it will take several days or weeks for Google go (re)index our website so that it can be better searched with Google,
References
[3] https://pages.github.com/versions/
[4] https://bundler.io/gemfile.html
[5] https://www.independent-software.com/generating-a-sitemap-xml-with-jekyll-without-a-plugin.html