
n8n is a web platform for setting up automated workflows. There are hundreds of apps and software integrations in the platform so that they can be embedded in the automated workflow through APIs. This post goes over the process of setting up a workflow for automatically fetching the to-do list in a Notion page every day and post reminder message to a Slack channel. I am using my self-hosted n8n platform on my own VPS hosted with Oracle, and I will go through the procedure of setting up the self-hosted n8n instance, how to set up a secure HTTPS connection using Cloudflare and local nginx reverse proxy, how to set up the n8n workflow together some tips and tricks for problem solving along the way.
First, to set up the n8n platform, it is for sure recommended to use docker. The official n8n website gives detailed instructions for how to set up docker and use it for firing up the n8n service – see Ref. [1]. In my case, I was using 1Panel [2] – a web-based linux server management control panel (similar to aaPanel [3]). Some of the documentations for this tool are in Chinese but they do have English version of the documentation for setup, as can be found in Ref. [2]. The installation only requires a single command and after the installation process finishes, information will be printed out on the terminal to tell where to go next. Normally, we can visit the domain name plus the port assigned to the 1Panel service to hop into the web platform. Here, I am using the domain name service provided by Squarespace (originally, I got the domain name from Google domains and starting from July 10, 2024, Google transferred all domains originally set up with Google domains to Squarespace [4]). Once we set up the domain name, we need to set up the A record to let the domain name point to the IP address of our VPS. Taking the Squarespace service as an example, first, we log in and we will see the dashboard,
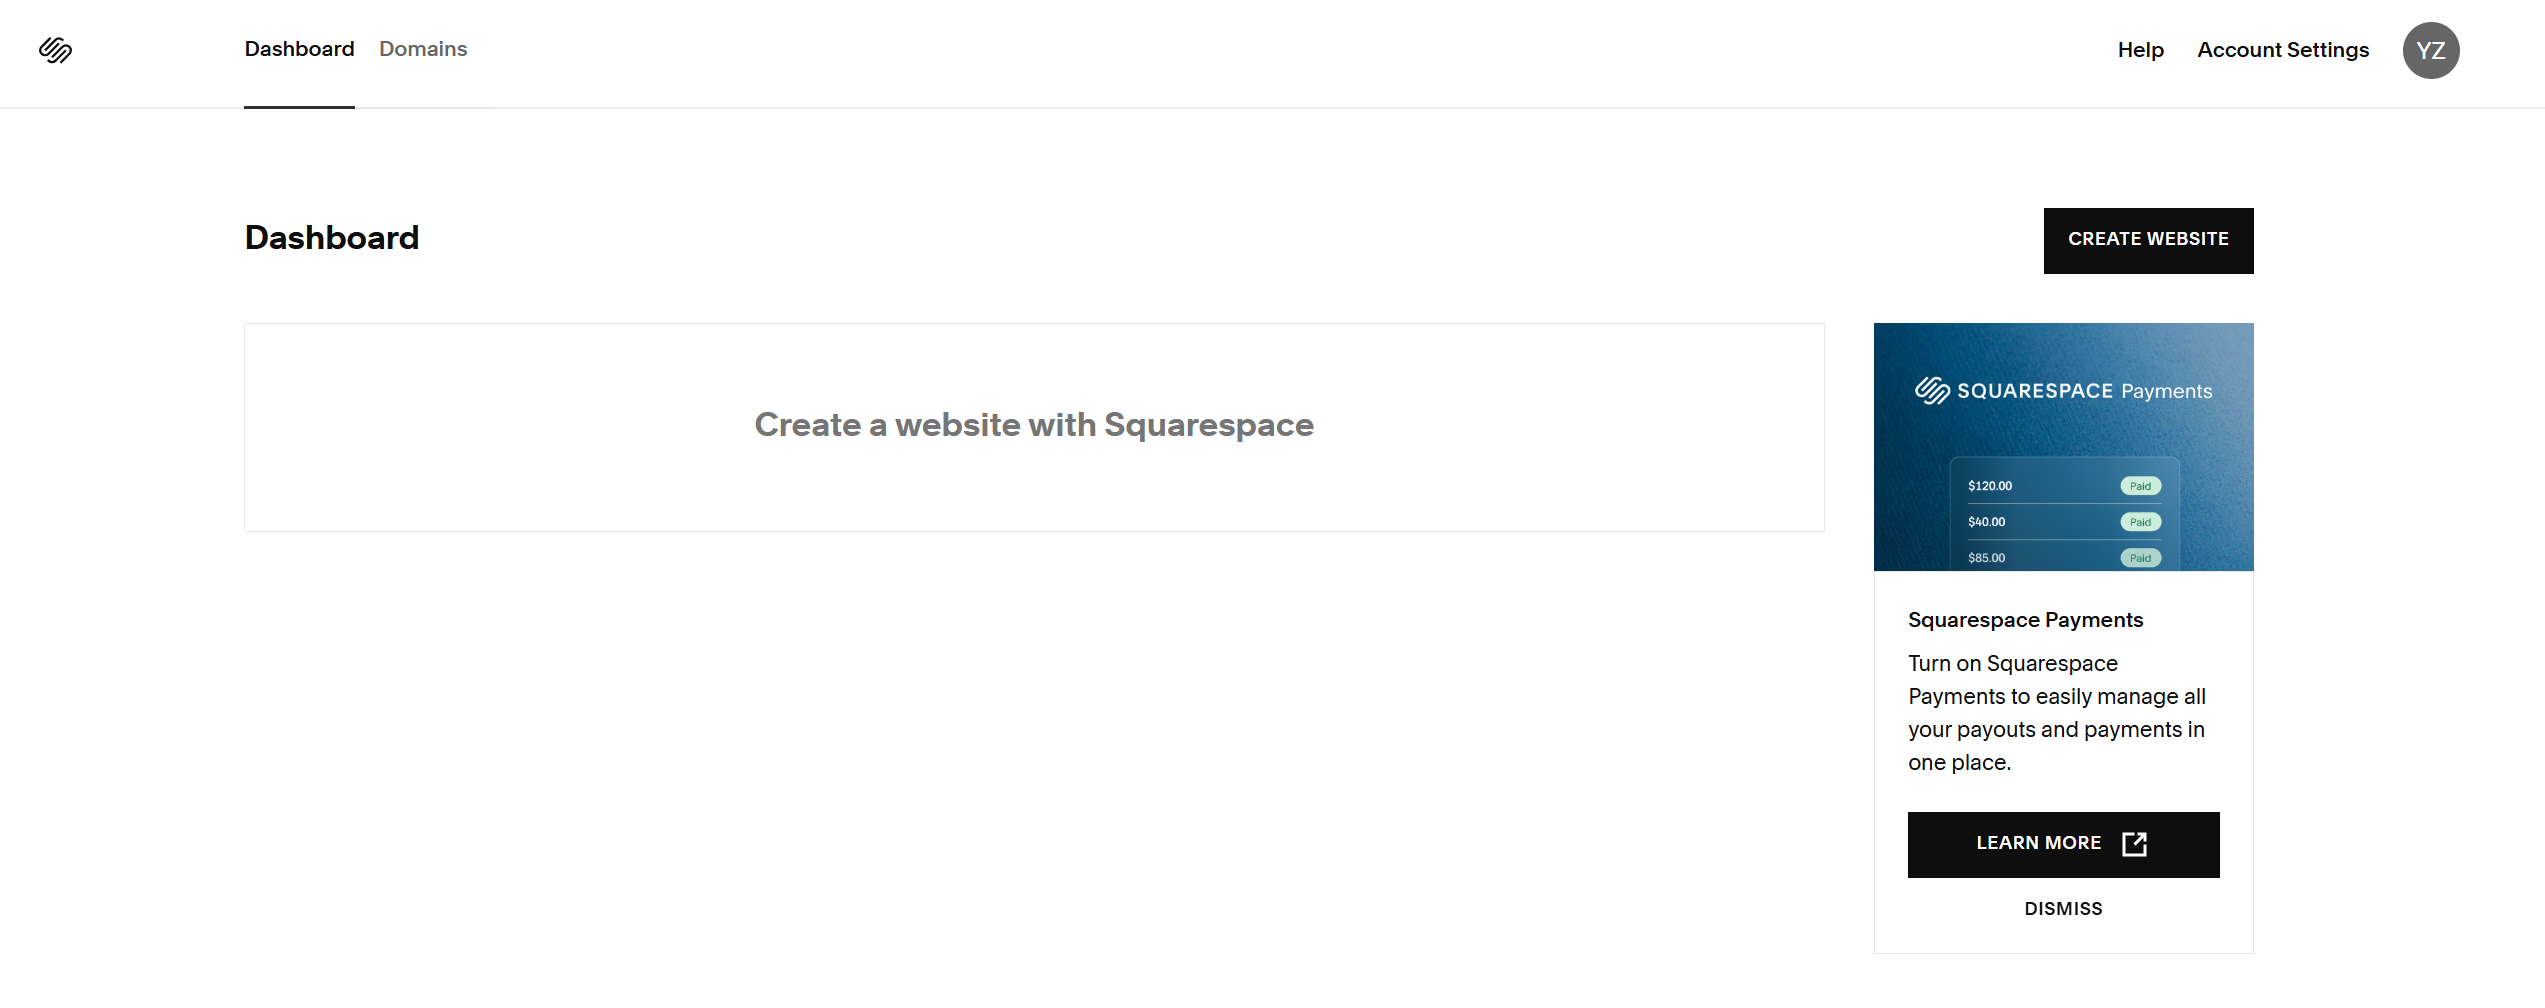
Then we go to the Domains tab, where we will see our purchased domains,

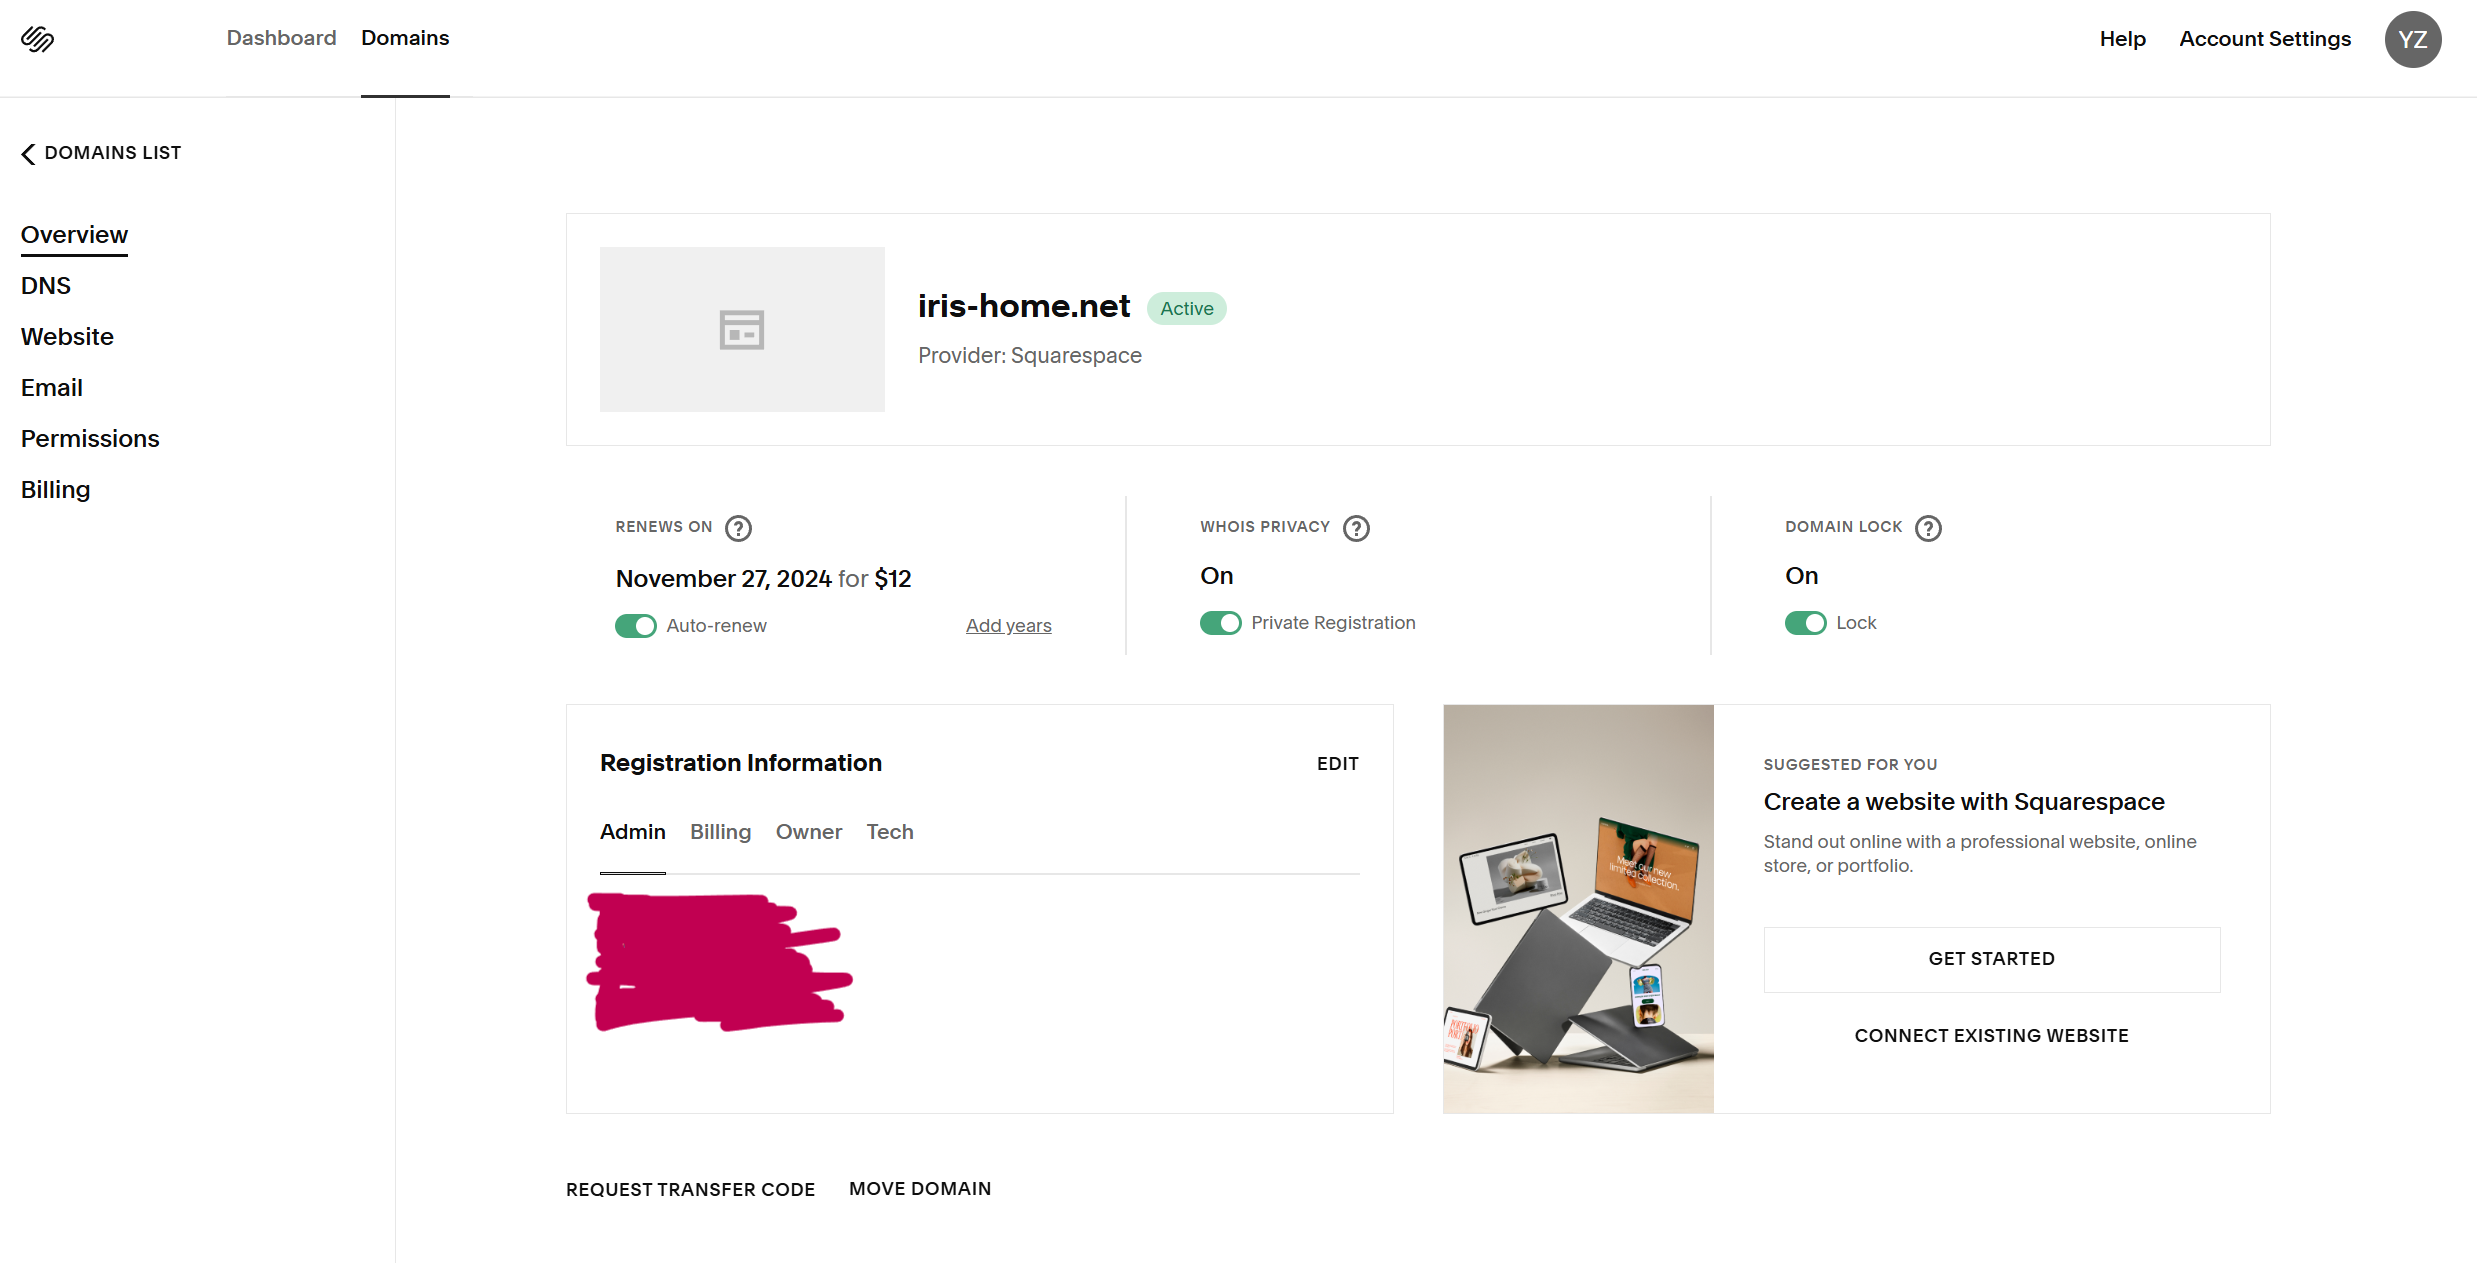
Clicking on the domain name that we want to set up the A record for, like in my case, the iris-home.net one,
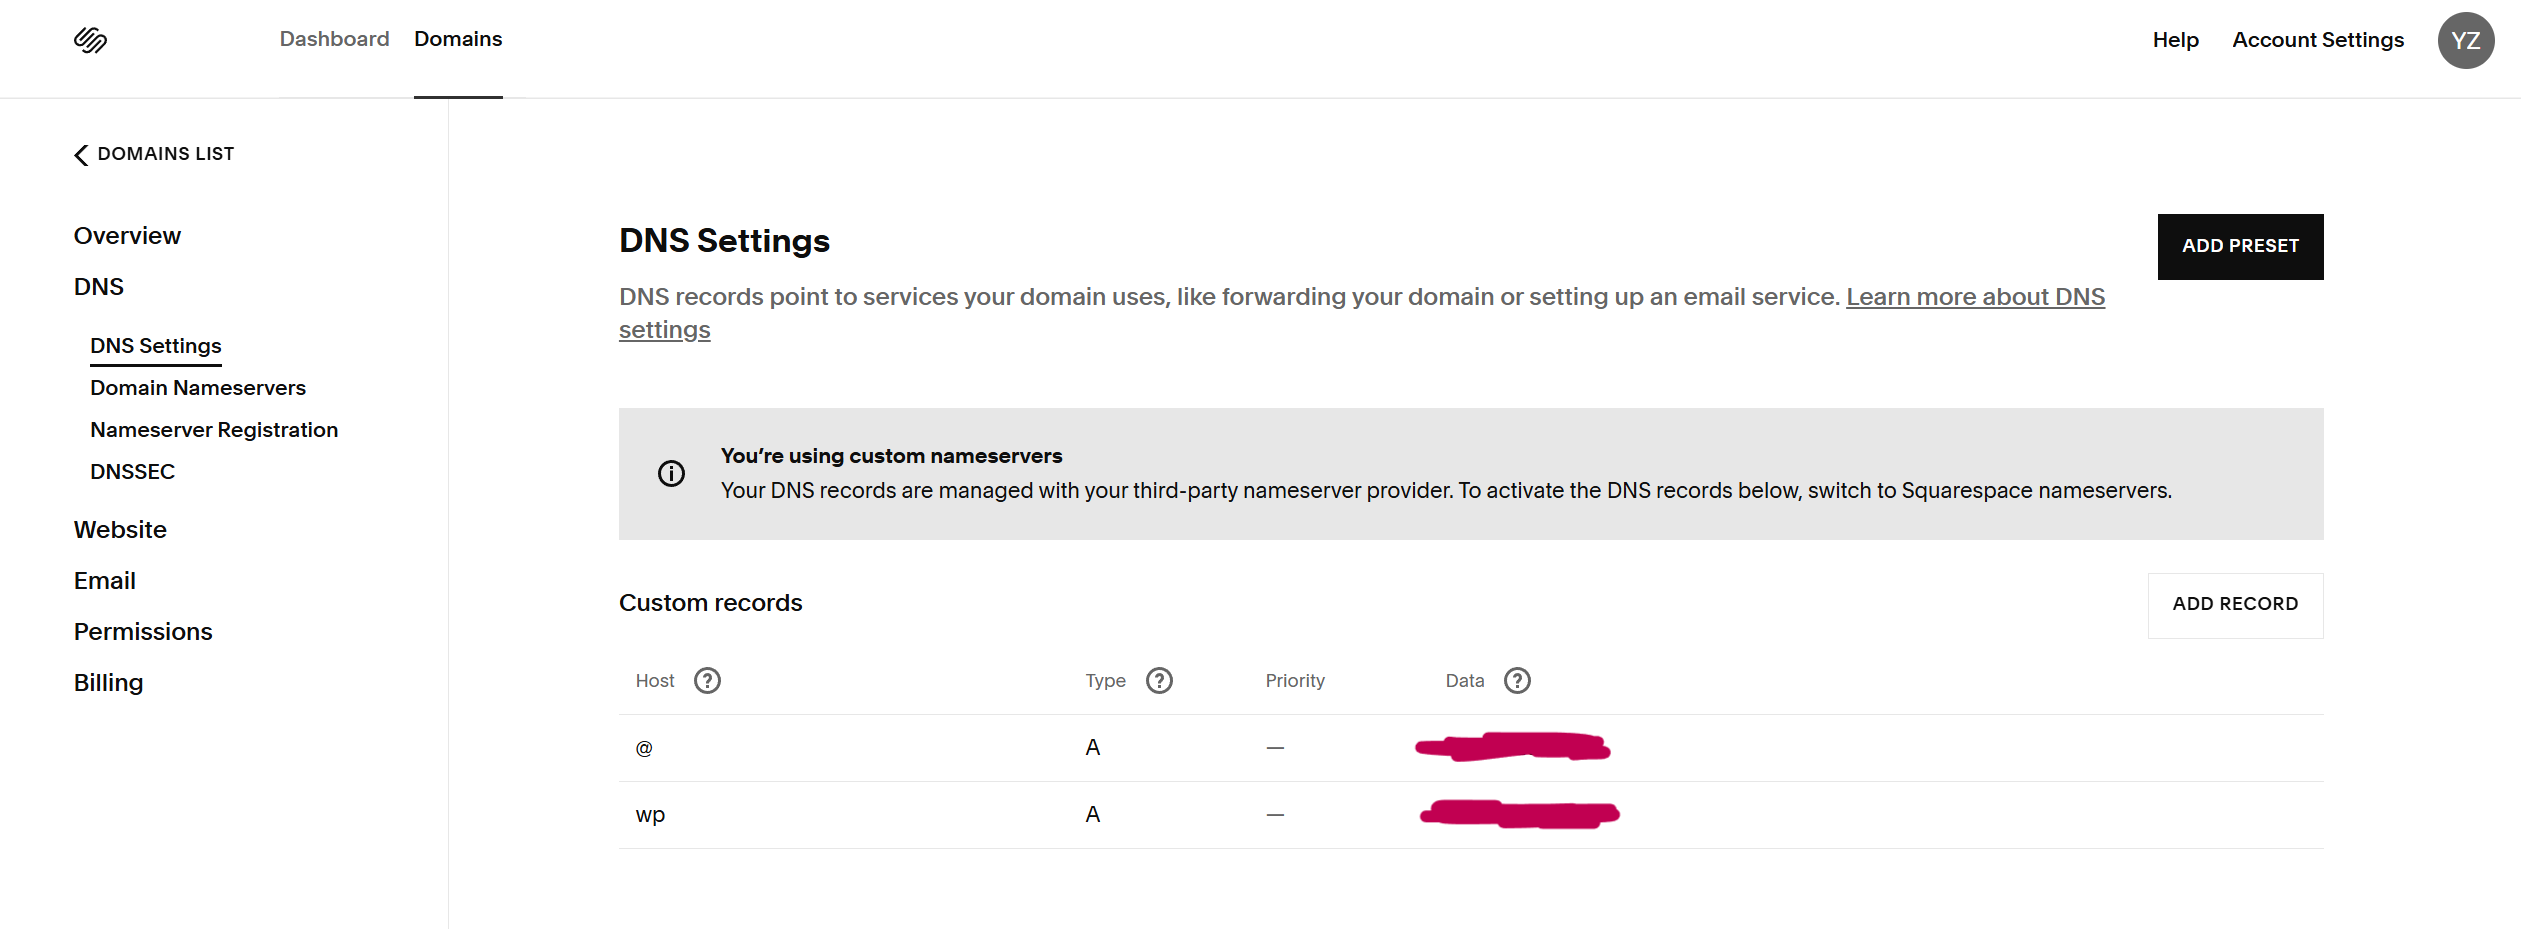
We then go to DNS \(\Rightarrow\) DNS Settings where we can add in the A record, by clicking on the ADD RECORD button and put in entries as needed – basically, we need to put in our IP address, the type of record (i.e., A) and the Host. Here, with the Host option, it is possible to set up the secondary domain name, e.g., something like, second.iris-home.net with my domain name iris-home.net, where second can be any arbitrary name we pick. If we don’t want to bother with the secondary domain name, we just put down @ in the Host entry so that we stay on the top level domain name, namely iris-home.net.
Once we set up the domain name and install the 1Panel tool, we can bring up the interface by visiting our domain name plus the port. With this platform, we can go to the App store and should be able to find the n8n app. Installation of n8n is then simply a few steps of clicking on several necessary inputs, like the port number to use, etc. The only thing that we may need to pay attention to is probably to check the box Port external access to allow firewall exception for the port. To be honest, I am not sure what if we don’t check the box, but I always check it and it seems to be working fine. In fact, the 1Panel is using Docker in the backend for the apps installation and therefore it is not really making any real difference in terms of the service running in the backend, no matter whether we manually use Docker for the installation or we install it via 1Panel.
Once the n8n service is installed, we should be able to visit the platform by visiting the domain name plus the port number. However, we may want to go a bit further to make the connection secure via HTTPS. To do this, I already have some instructions in my blog – see Issue #3 and the corresponding solution in the post in Ref. [5]. In that post, the instruction is about how to use nginx for such a purpose where we were using Cloudflare for the secure connection. Basically, we set up the proxy in Cloudflare so that each time people visit our site, what actually happens behind the scene is, the traffic will go through Cloudflare first (where all the magic happens to ensure the traffic is safe), then Cloudflare will visit our server and it is actually the nginx server on our VPS that Cloudflare is actually visiting. Then nginx first redirect the traffic to the local server that is running on our VPS (namely, the localhost plus the port number). Here in this port, I am going to put down the instructions on the Cloudflare side about how to use Cloudflare to take care of our domain for secure connections. To do this, we need a Cloudflare account, for sure. Getting an account is easy, at Ref. [6]. With a valid account, we log in to access the dashboard and click on Websites in the sidebar on the left.

Here we are expected to see all domain names that Cloudflare is taking care of, under our account. It can be the domain name that we bought with Cloudflare itself. Or, it can be the domain name that purchased from anywhere else. The instructions that follow applies to the second situation. My domain name iris-home.net is already in the list as I already got it configured, in which case we can click it to go to the domain name configuration page and further click on DNS \(\Rightarrow\) Records in the sidebar on the left and scroll down to the bottom of the page to see the Cloudflare Namerservers, as follows,

We then need to copy the name servers here and put them into the Domain Nameservers settings in our domain name provider. Again, taking Squarespace as the example, we need to put the name servers that we got from Cloudflare here as shown below,

Once the connection is set up properly, we can go back to Cloudflare and put in records in the DNS settings (Websites \(\Rightarrow\) click on the domain name \(\Rightarrow\) DNS \(\Rightarrow\) Records) for the domain name. Simply, we click on Add record, put in a name (again, @ for root and any other valid strings for secondary domain name), make sure the record type is A and make sure the Proxy status is active. Then the instructions mentioned above (i.e., Issue #3 in Ref. [5]) should work and we can visit our n8n service via HTTPS connection.
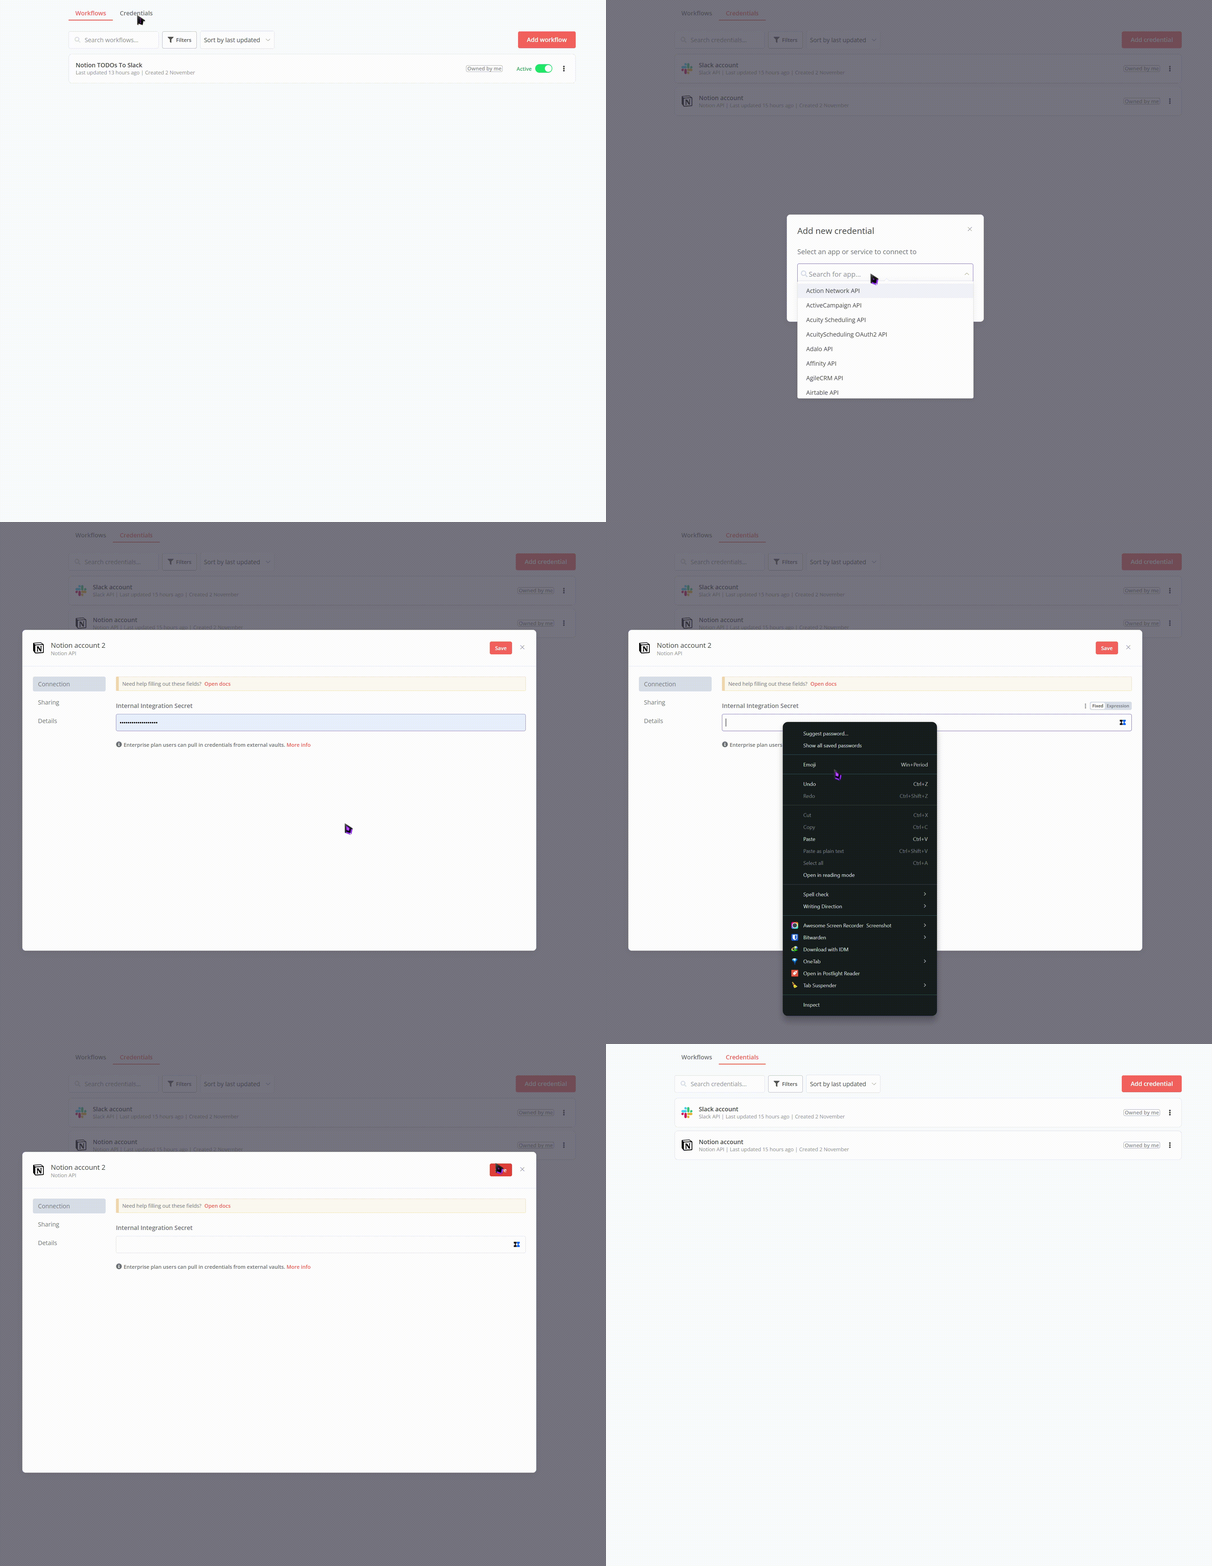
Next, we will cover how to set up our Notion + Slack workflow in n8n. Before start, we need the Notion and Slack APIs. For Notion, we can refer to the instructions in Ref. [7] to set up the Notion integration and grab the API key. For Slack, we can refer to the instructions in Ref. [8] – ignore step-11 in the instructions unless we want to configure the workflow to react to messaging in Slack to update Notion page (kind of the reverse direction compared to what we are going to set up here, i.e., Notion page contents will be posted to Slack). Then we need to put the Notion and Slack APIs into n8n – refer to the steps shown in the GIF image below (for the Notion API and the Slack one is pretty similar),
Now, we are ready to create our workflow for the Notion + Slack connection. We can for sure start from scratch to put in all the components in the workflow and hook them up, and the process can be a bit tedious even for a simply workflow like the one that we are going to create here. So, we like template which we can take from others who have ever gone through the pains, to save some efforts of starting from scratch. We can the tweak the workflow as we want and save it as another template to share with people. This is exactly what I did here – initially, I was taking the template in Ref. [8] and I was tweaking it a bit to save it as my own template which can be found in Ref. [9]. Here, we are going to import the saved JSON configuration file to set up our workflow, according to the demonstration below,
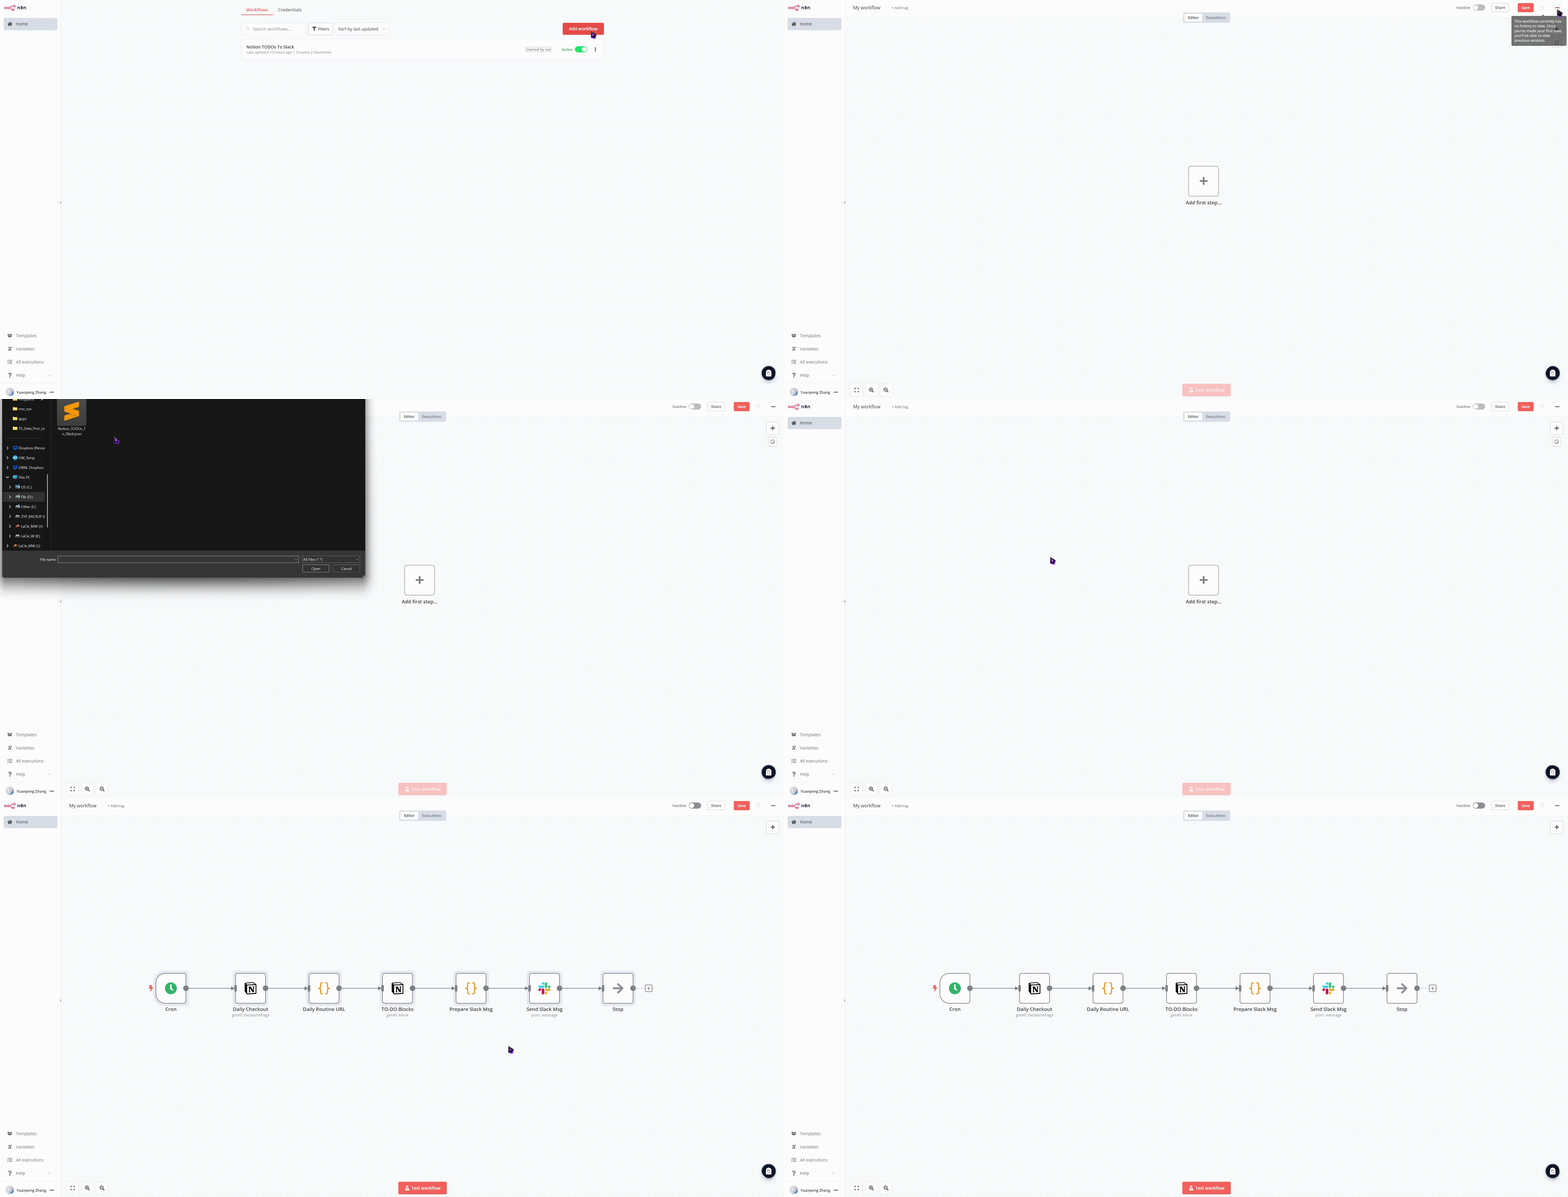
Importing the workflow saved by others should not directly work as the workflow contains the nodes that require Notion and Slack APIs. So, initially after importing the workflow JSON file, we would see excalation marks along the nodes where APIs are needed – in the demo above, I did not see such errors as I was importing the workflow saved by myself so it knows my APIs. In case of APIs needed, we can follow the steps below to put in the missing APIs,
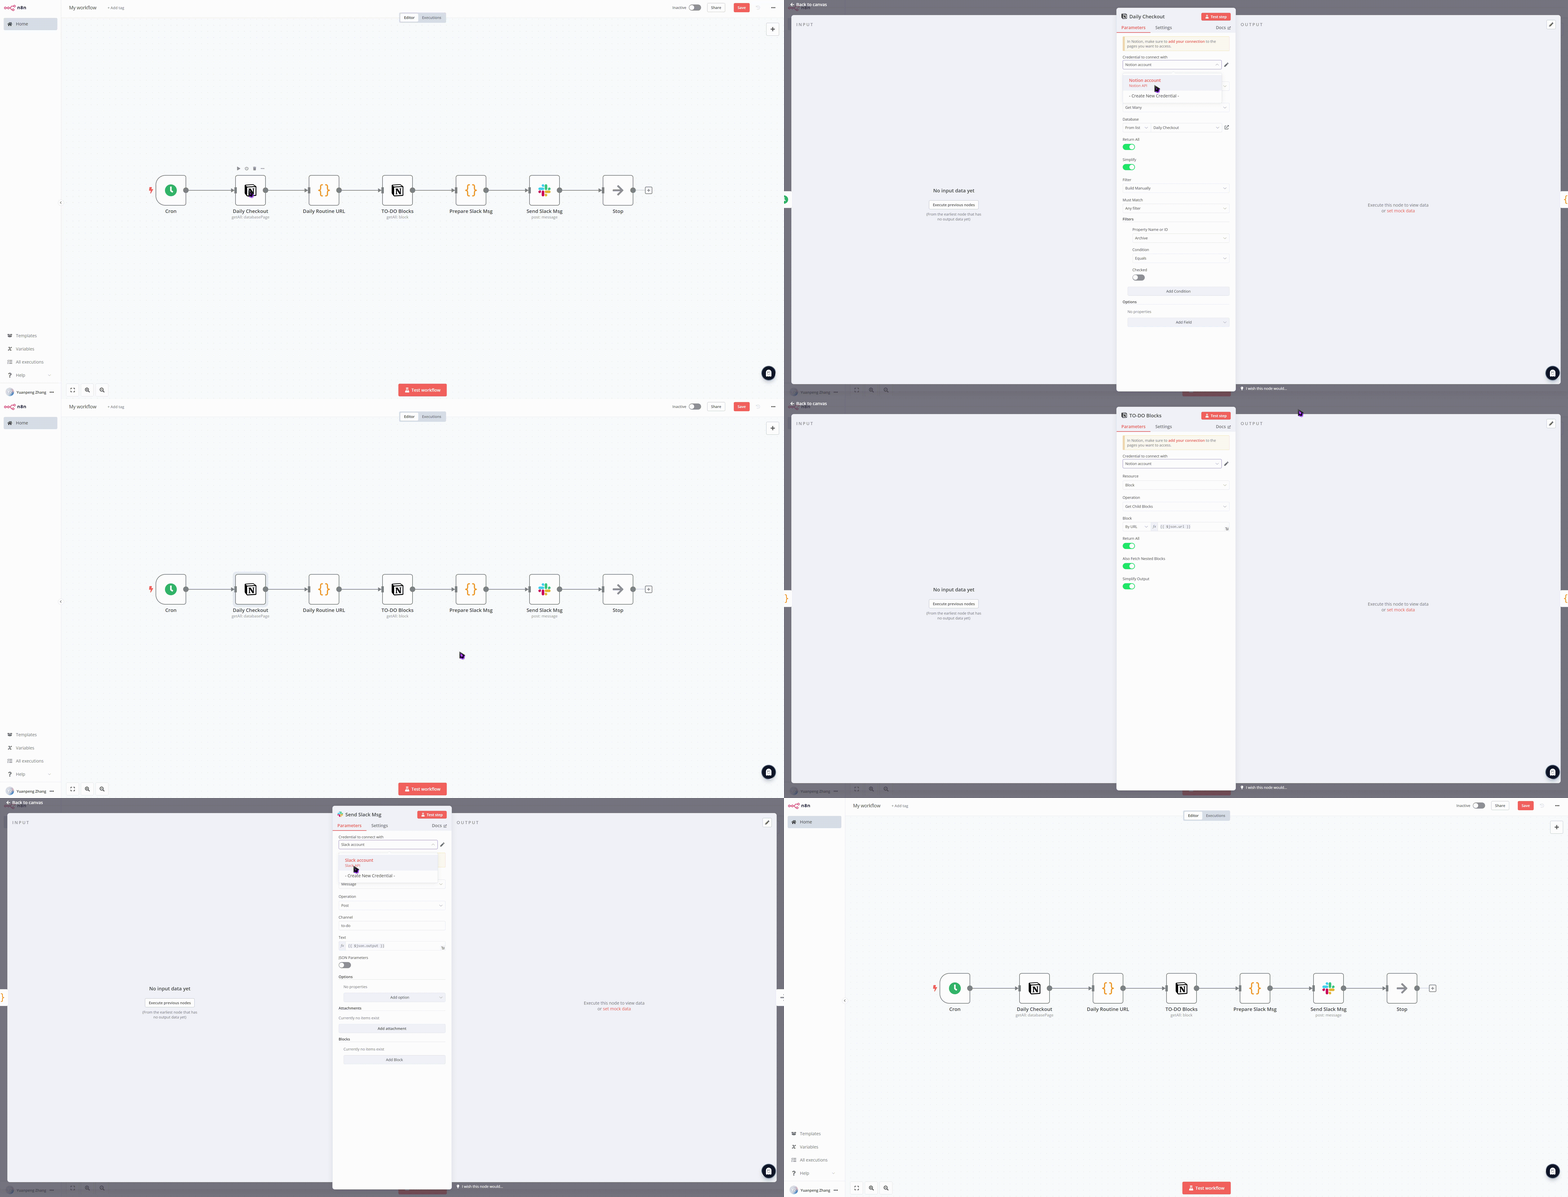
Once we put in the missing APIs and make sure no errors seen, we can click on the Test workflow at the bottom of the page to see whether we can run the workflow without problems. With a high chance, we will see some errors, due to the Notion database and page selection, and the Slack channel name configuration. For Notion page selection to work, in my workflow, I have to have a Notion database called Daily Checkout (with the Gallery layout) in which I have pages containing my daily checkout (a lot of todo items). The workflow will pick up the first page in the database, process it to fetch all those todo items and pass them to further nodes until finally getting ready and being posted to Slack. For Slack channel message posting to work, when we set up the Slack app, we for sure need to selet suitable scopes (see Ref. [8]). Meanwhile, once the app is set up properly, we need to add the app to the channel that we we want to post to, following the instructions below,
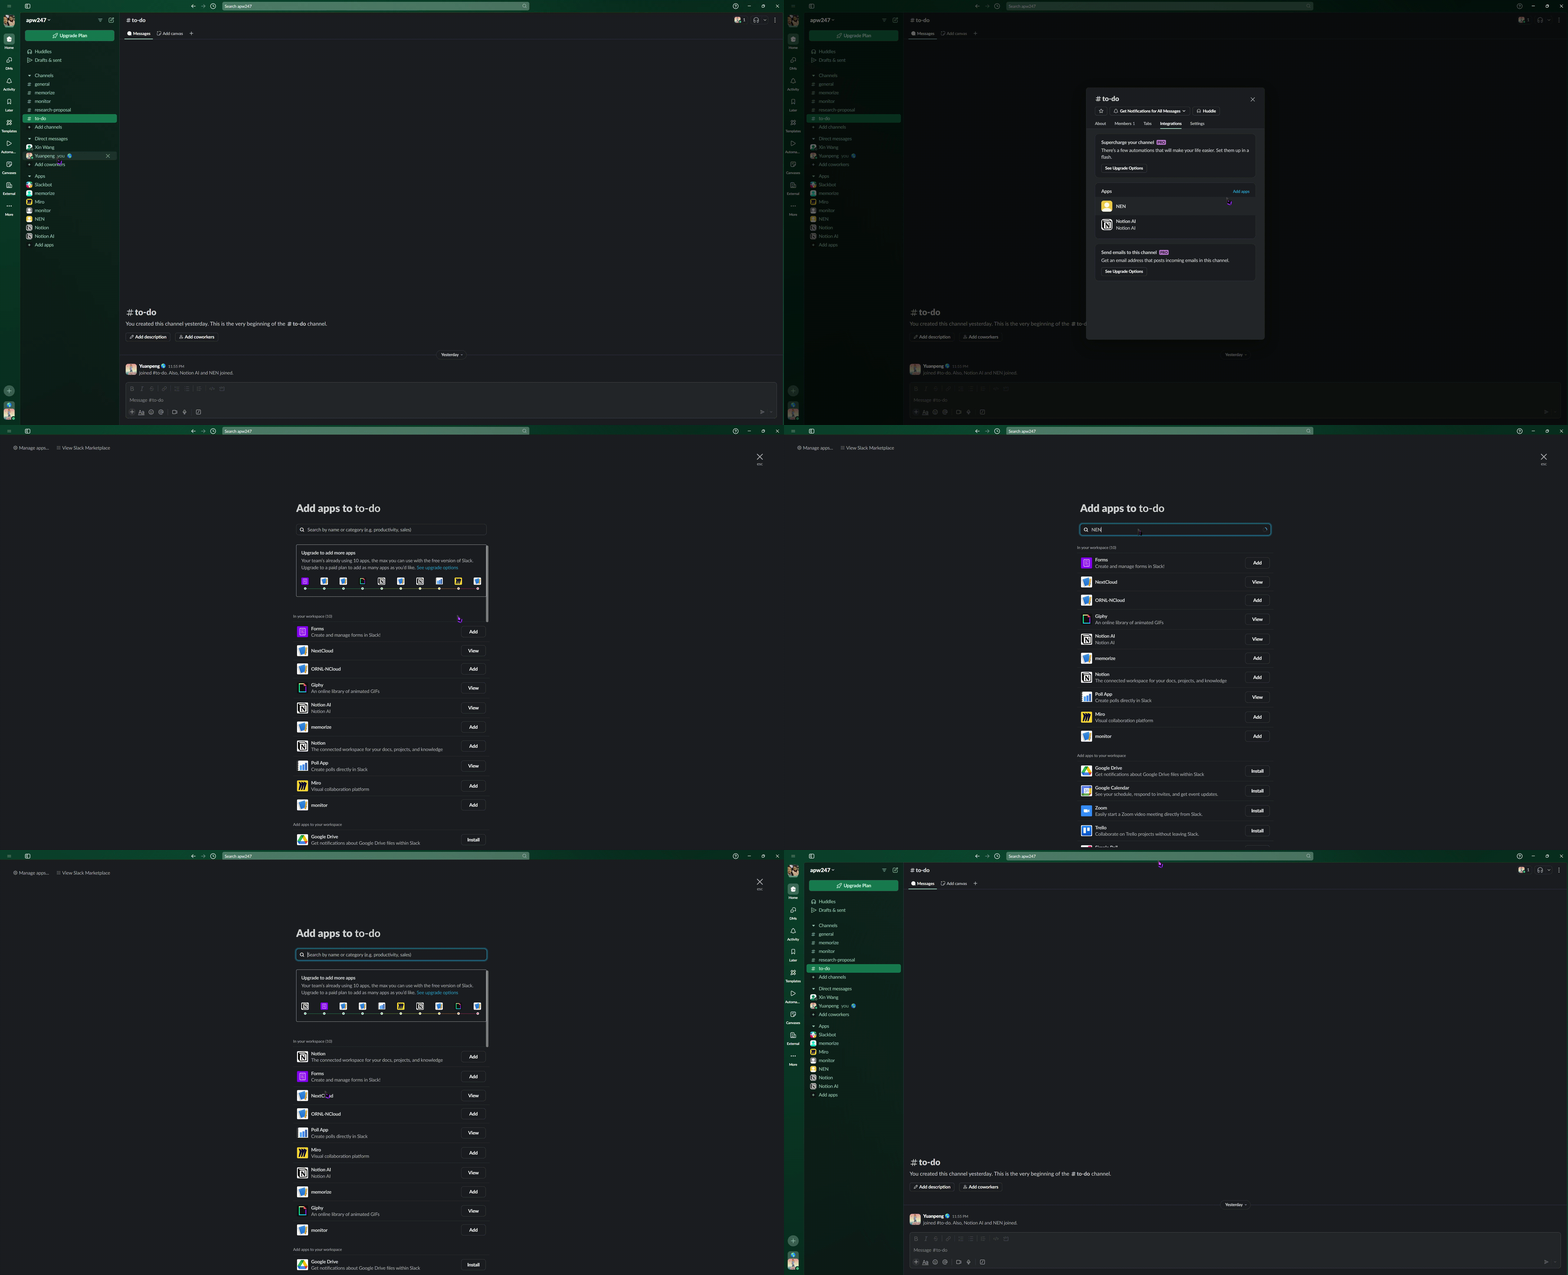
That’s it! We can start enjoying the automated workflow now – every morning on 9:00, the workflow will go in our Notion page, check our todos, collect them and pipe them through the workflow and finally post all those todos into our specified Slack channel.
References
[1] https://docs.n8n.io/hosting/installation/server-setups/docker-compose/
[2] https://github.com/1Panel-dev/1Panel/blob/dev/docs/README_EN.md
[4] https://support.google.com/domains/answer/13689670
[5] https://iris2020.net/2023-09-08-docker_nginx/
[6] https://dash.cloudflare.com/sign-up
[7] https://docs.n8n.io/integrations/builtin/credentials/notion/#using-api-integration-token
[8] https://n8n.io/workflows/1105-check-to-do-on-notion-and-send-message-on-slack/