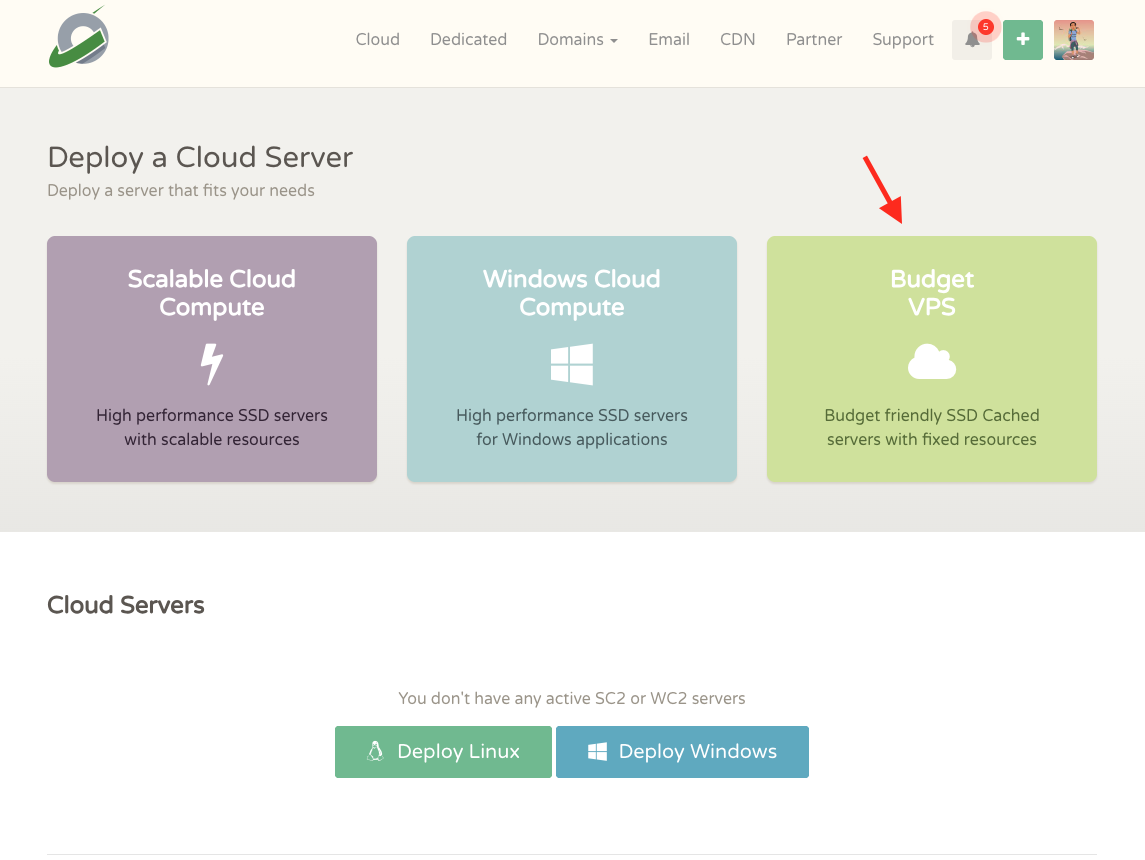
CloudCone is one of the companies providing cheap-access VPS for personal usage to host web services that do not require high-end computations. Here in this note, I will put down some setup notes on configuring a budget VPS on CloudCone and use it for hosting some web services. First, we visit the front page of the CloudCone platform and we will see the interface as below (register an account if we don’t already have one),

We can choose the Budget VPS from the list as shown in the picture above and follow the instructions to set up the VPS. In my case, I am running a Ubuntu 24.04 OS on the VPS with 4 CPUs and 4 GB memeory. This should be enough for hosting several web services, and in my case, I am running,
StirlingPDFDashHomarrLinkWardenhomepageGlancesTeableCallMe
And roughly they are altogether taking ~70-80% of the memory.
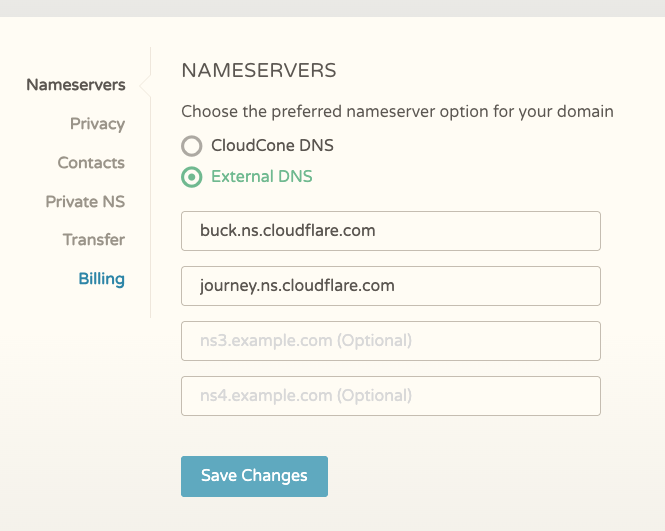
Once we set up the VPS, we grab the IP address and want to set up a domain name for it. CloudCone provides its own domain name registration service and for sure we can register a domain there. However, in my case, I always prefer to manage the domain on CloudFlare so those web services can be proxied through CloudFlare. If we register the domain through CloudCone and want to use CloudFlare to manage the domain, we want to go to Domains in CloudCone and further go to Manage Domains. Then click on the Manage button for the domain we want to configure. In the Nameservers setting, we want to use the nameservers from CloudFlare like below,

Then we can configure the DNS records in CloudFlare. To do the configuration, we go to CloudFlare dashboard, click on the Onboard a domain and follow the instructions to add the registered domain in CloudCone into CloudFlare. Notes for a similar situation can be found in Ref. [1]. Then we want to click on the domain name we just added and go to DNS \(\rightarrow\) Records and add in records for the DNS in there. First, we want to add in the A record to point the root domain name (put in @ in the name box) to the IP address of the server, and we want to disable the proxy. The second one we want to add in is the A record for www (for this one, we can enable the proxy). That is pretty much all the basic setups. For web service hosting, we can add in other secondary domain names (i.e., give a meaningful name in the name box to point the domain name like spdf.iris-2020.net to the IP address of the server). Here, spdf is the name I have in the name box and iris-2020.net is my registered domain name. Detailed notes about setting docker container + nginx + CloudFlare to host web services on the VPS and proxying through CloudFlare to make sure a secure connection with the outside world can be found in Refs. [2, 3] and I won’t reproduce them here.
One thing I do want to note down is, by default, the port access is not enabled on the VPS with CloudCone. For the VPS other than Budget VPS, we may be able to get access to the firewall control in the web dashboard of CloudCone, but for the Budget VPS instances, we don’t have access to the firewall control through the web interface. But we do need to enable the firewall control for the VPS, which then we have to do on the VPS server. In my case, I am using ufw, and I need to execute the following commands to enable the traffic through the 80 port on the server [4],
sudo apt install ufw
sudo ufw enable
sudo ufw allow 22
sudo ufw allow 80
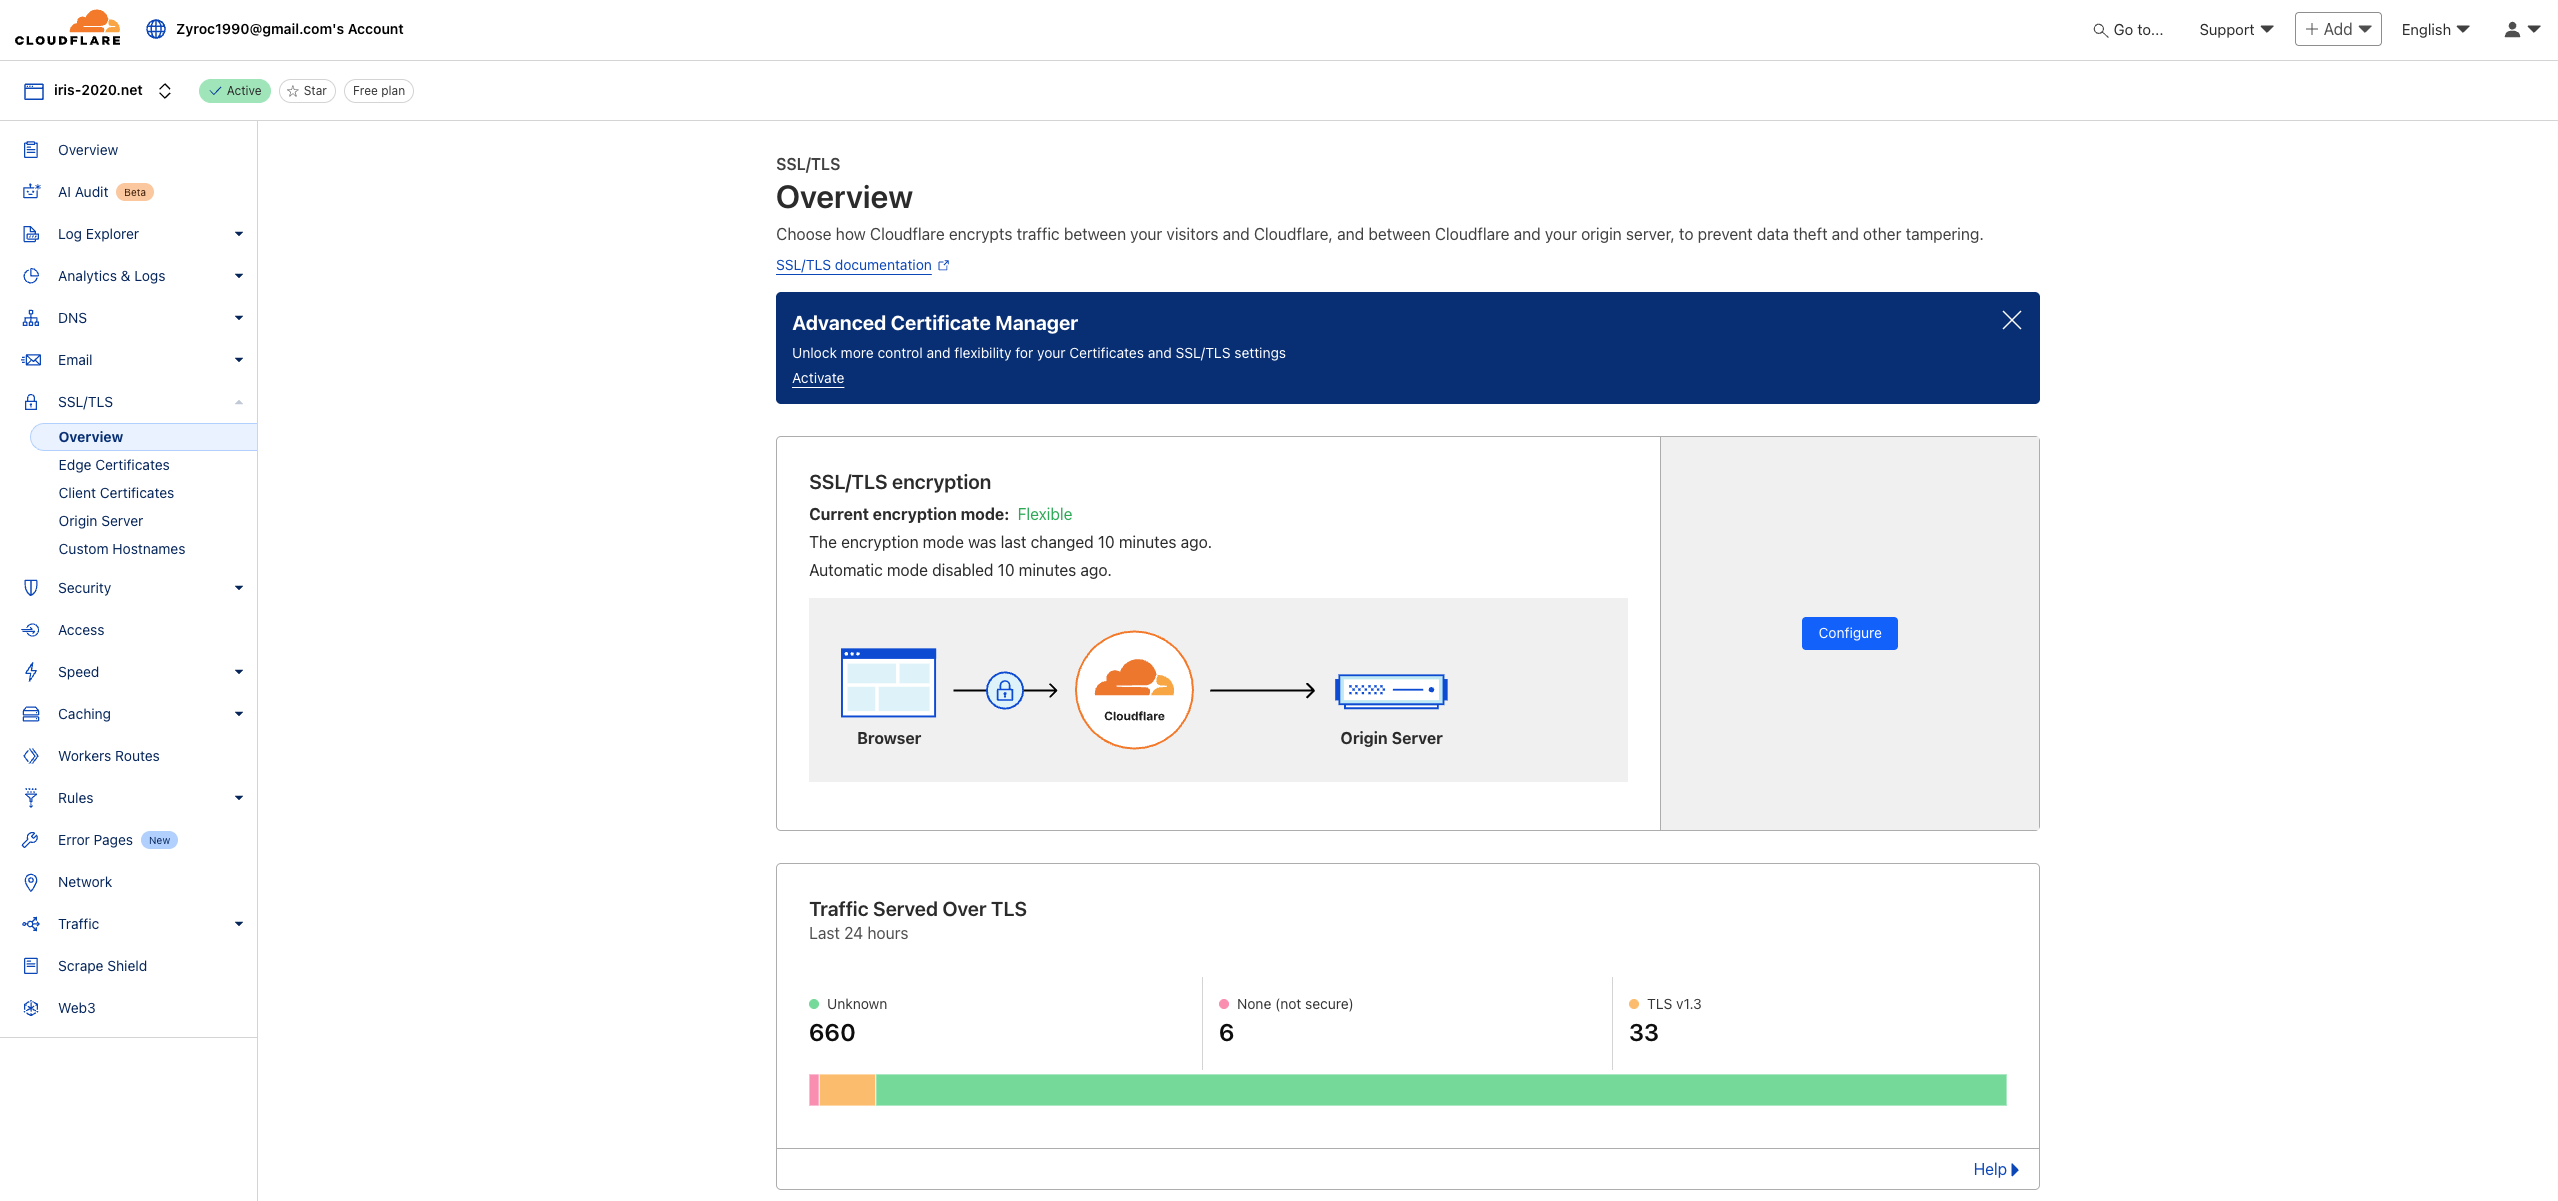
The 22 one may not be necessary but the 80 port configuration is necessary, since otherwise CloudFlare cannot talk to the VPS server. Regarding this, what happens when a browser is requesting a web service running on the VPS, e.g., spdf.iris-2020.net, is this – the user browser will talk to CloudFlare first through the domain spdf.iris-2020.net, then CloudFlare will talk to the VPS server through the 80 port. Then on the VPS server, we configure the nginx service as such that the traffic through the 80 port will be redirected to other ports and such a redirection of traffic only happens locally on the VPS server. Also, because it is CloudFlare that is talking to the VPS through the 80 port, this is still deemed as secure since we trust CloudFlare and the outside world never directly talk to the server through the 80 port. With this regard, we need to make the 80 port accessible so at least CloudFlare can talk to the server through the port and this is why we need to configure the firewall as above. If we don’t do it, we would encounter the CloudFlare 502 error, meaning that CloudFlare cannot talk to the server. Regarding the connection from CloudFlare to our VPS server, there are some relevant settings in CloudFlare – if we go to the domain name manged by CloudFlare and further go to SSL/TLS \(\rightarrow\) Overview, we will see the following configuration,

In my case, I was choosing the Flexible mode, meaning that encryption is only enabled between visitors and Cloudflare. This will avoid browser security warnings, but all connections between Cloudflare and your origin are made through HTTP.
I am not sure whether the
Fullmode requires some dedicated further setups. Since theFlexiblemode works just fine, I am not bothering with theFullmode.
References
[1] https://iris2020.net/2024-11-03-n8n_notion_slack_workflow/
[2] https://iris2020.net/2023-09-08-docker_nginx/
[3] https://iris2020.net/2024-01-15-yourls_docker/
[4] https://documentation.ubuntu.com/server/how-to/security/firewalls/