
Dify is an LLM application platform which can provide access to various LLM models, tools and applications. With it,
we can build our own ChatBot server acting just like ChatGPT. At the backend, it utilizes the LLM services from various
providers, such as openAI, Gemini, etc., through API call. In my case, I am using both the openAI and Gemini API
calls. Within the Dify platform, we can create apps serving different purposes and they are independent from each
other. Also, we can set up our own knowledge and use that together with the API to train the chatbot with our own
knowledge base. Here in this blog, I am going to walk through the process of setting up our own Dify server, create
apps in it, add in our own knowledge base, and add in extra tools (such as DALL-E, Mathematica API, etc.) to access
more functionalities.
-
To self host a
Difyserver, we need our own VPS. In my case, I am using the Oracle VPS withARM64architecture. Oracle provides aalways-freeversion of theARM64VPS which comes with a very powerful configuration (4 CPU cores and 24 Gb RAM). One could obtain such a powerful and always-free service via Oracle Cloud.The
always-freeservice with such a powerful configuration isONLYavailable for theARM64architecture and it is not always available. It depends on the availability of Oracle resources in different regions. So, when registering for the service, choosing the region of the VPS server is important. Also, the registration process is bundled with credit card and personal information verification and once registered, the region cannot be changed. However, it may not be straightforward to know beforehand in which region will the powerful and always-freeARM64architecture be available. So, in practice, whether or not we can get the powerful machine for free is a bit luck-based. -
Once we have a VPS, log into it and grab the docker compose file here for firing up the
Difyservice. Usually, the docker compose file will be up-to-date to catch up with the backend codes and the docker images. So, for installation and update, we can, most of the time, rely on this docker compose file.Using the docker compose way for setting up the server, when we want to update the server, we may need to stop and remove the old docker containers for
Difyand all the other associated docker containers (such as thenginxand thedify-web) and then run the compose again with the up-to-date compose file. -
Once the
Difyserver is up, we can go to its admin page via the main domain name. The docker compose file should contain the port on host that theDifyservice will be running on. With the port number, we can for sure access the service with the IP address together with the port number, via the HTTP traffic. In practice, we may need a domain name and also to make our website secure, we also need to configure the reverse proxy (using, e.g.,nginx) and the SSL certificate, etc. Details on these processes will not be covered in this blog and we can refer to my another blog here. -
To add in tools in the up-to-date version of
Dify, in the admin page, we can refer to the following image,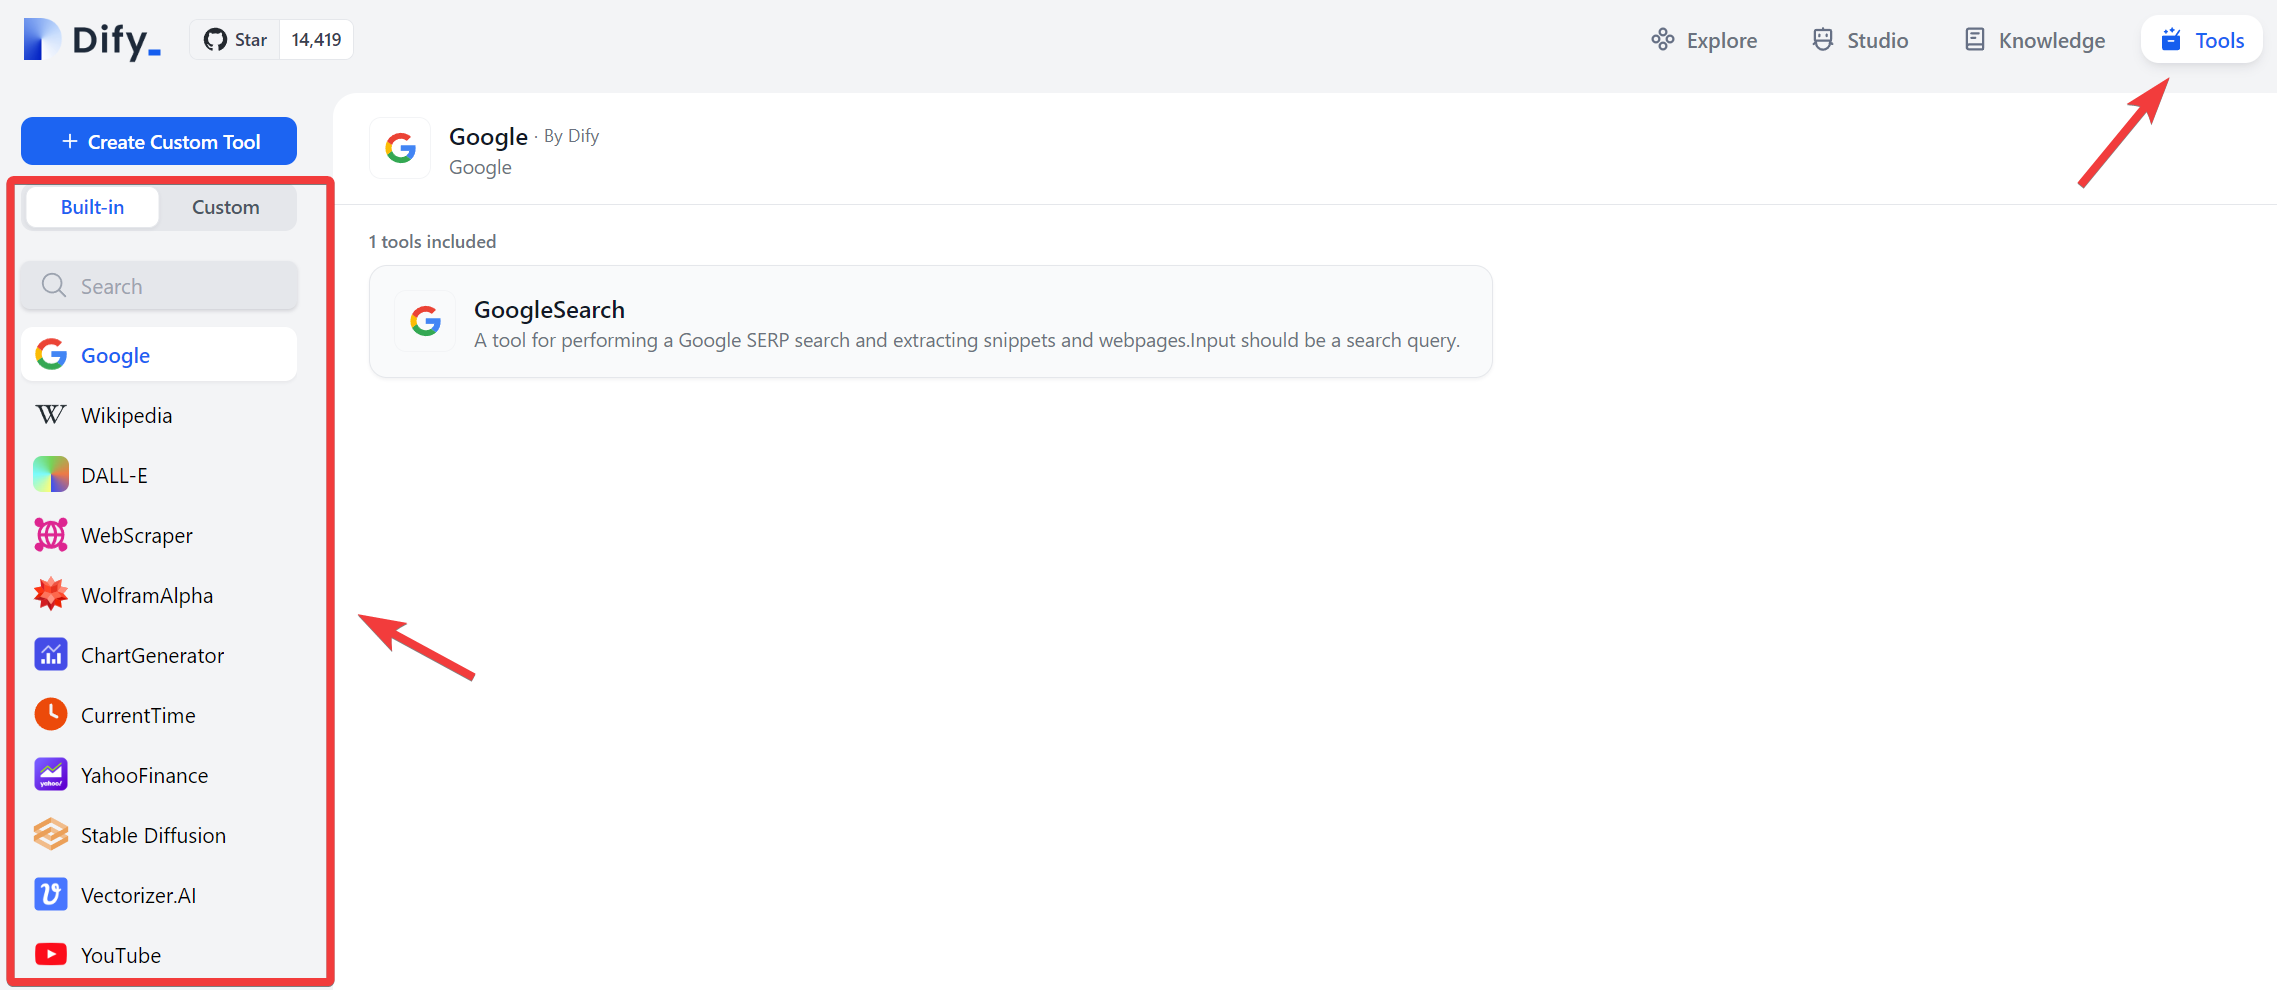
-
For some of the tools there, they need authorization which usually requires us to obtain API from the backend service provider. For example, to use the
DALL-Etool, we need to obtain the API from openAI and it is not free. Once authorized, we can go to theStudiomenu (see the top part of the image above) and either create a new app of click on and existing app to go into the app configuration page. First , we want to make sure that we should choose the type of the app asAgent Assistantbut not theBasic Assistantsince the tools can only be added inAgent Assistant.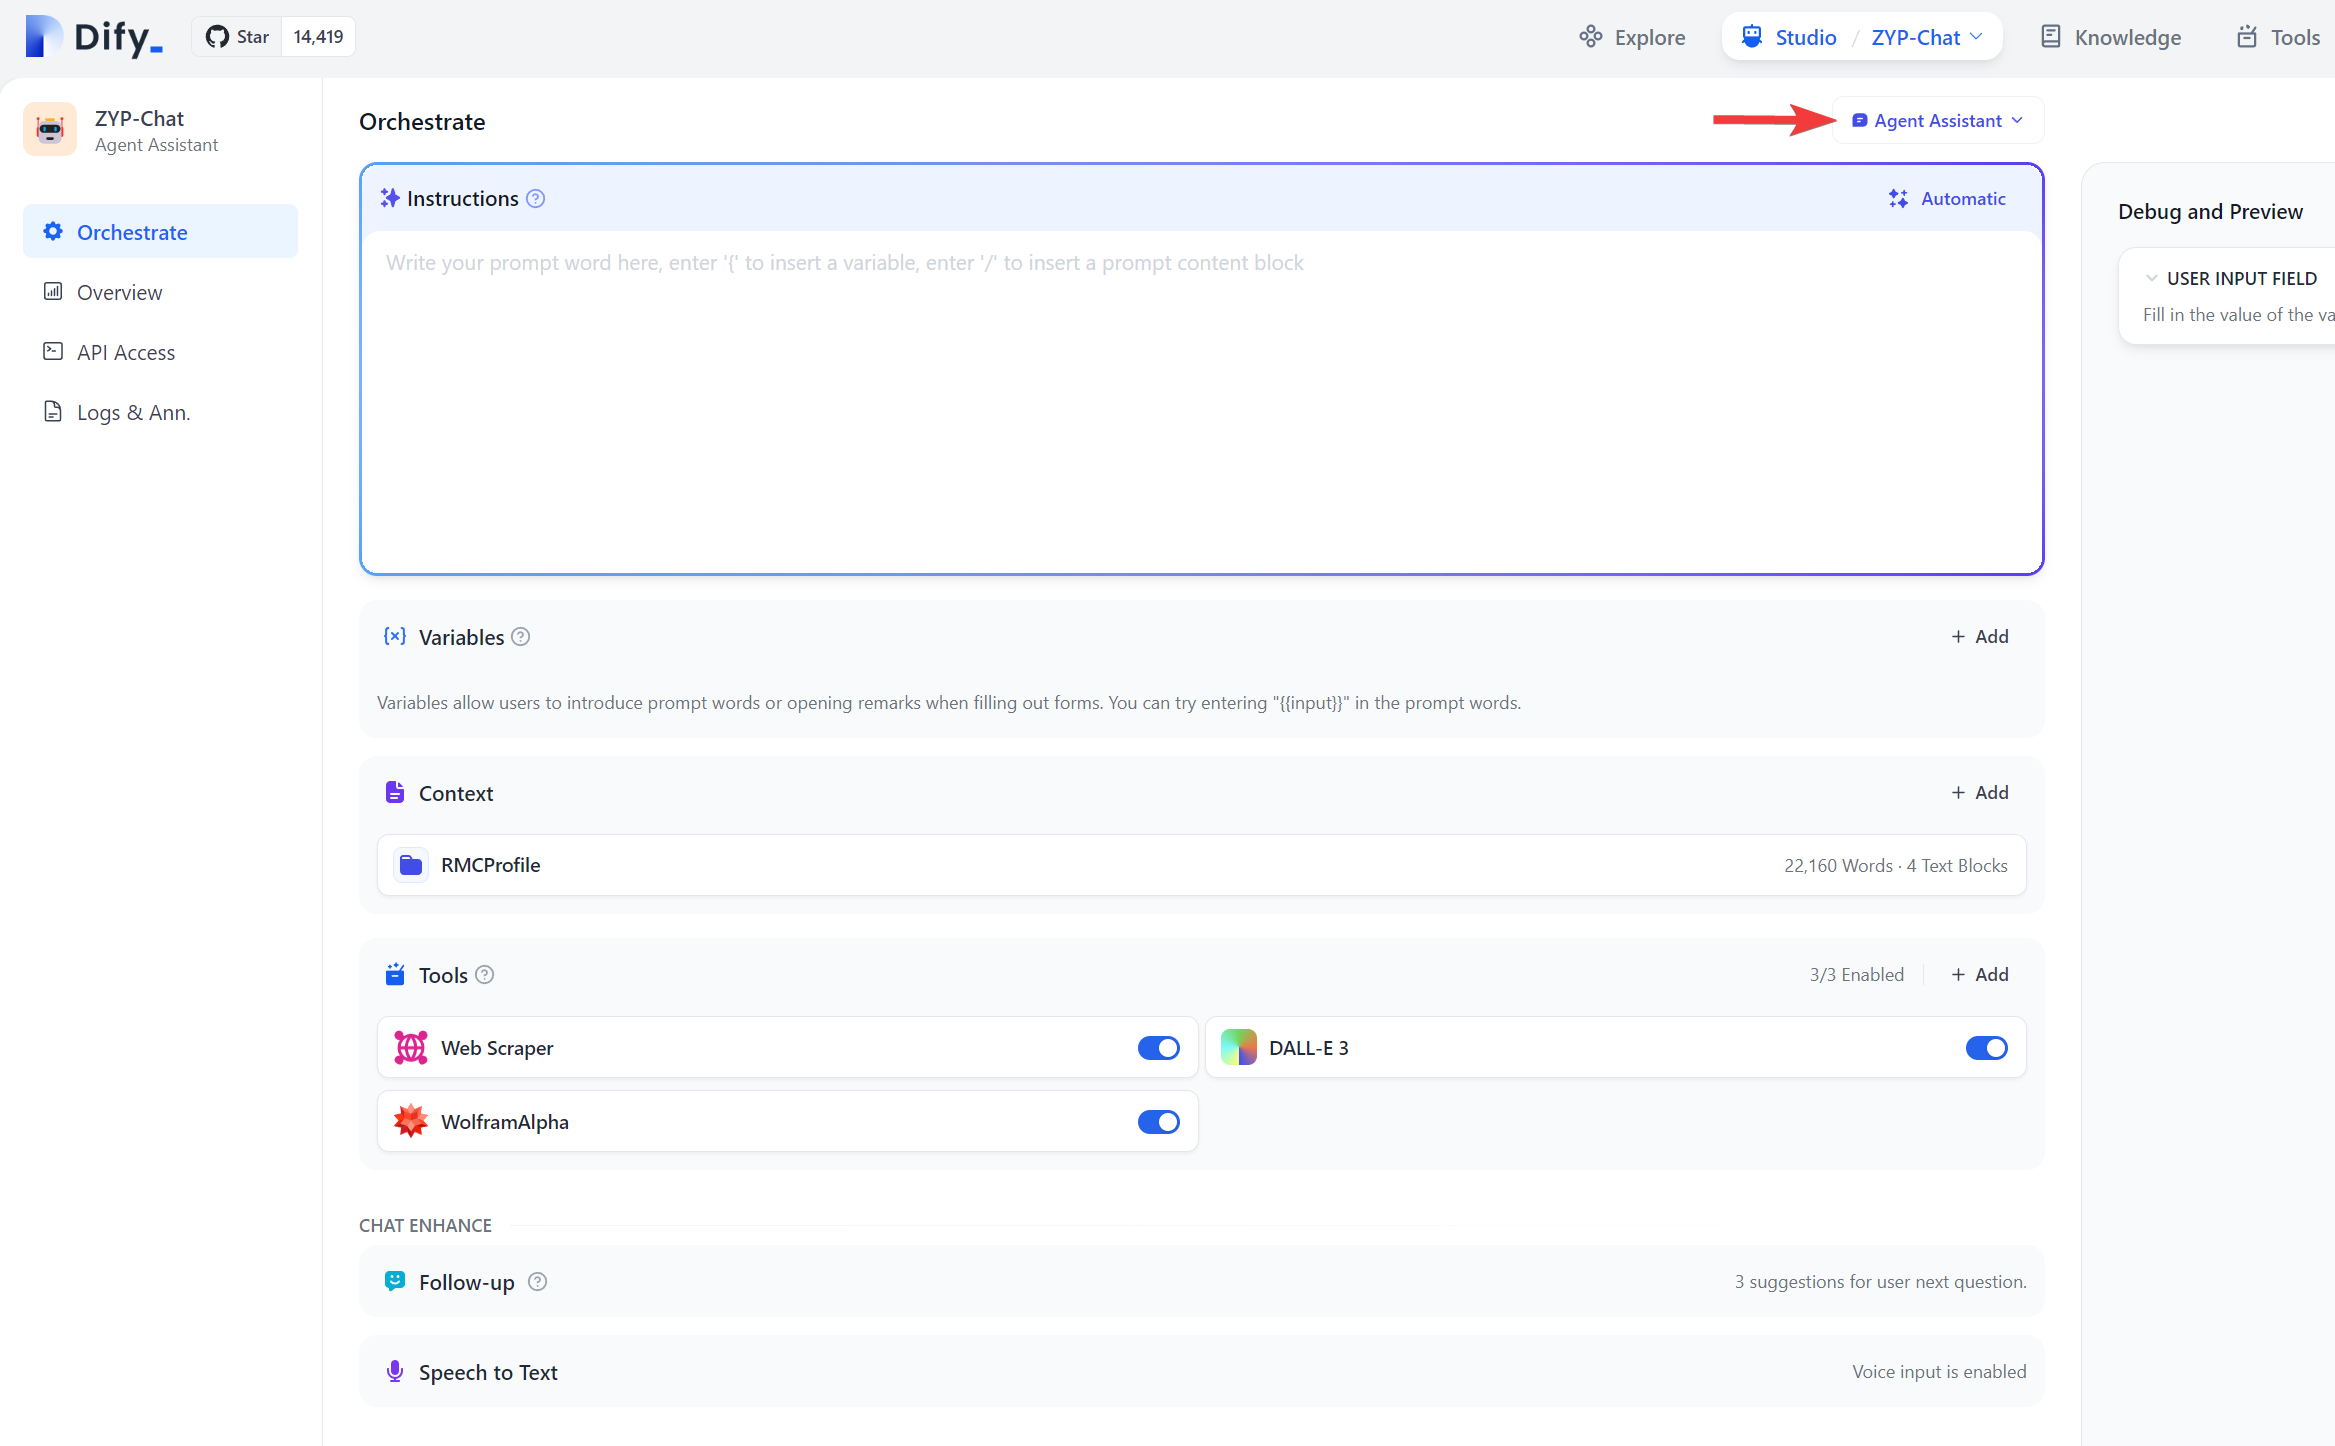
In my case, when trying to use the
DALL-Etool, there was a bug in theDifycodes and the tool implementation was not working. Refer to the link here for the solution.For using the
Mathematicatool, we can obtain our Mathematica API here. My company has theMathematicasubscription and therefore I can get the API access through my company account. Also, it is worth mentioning that after theMathematicaapp ID is created, we need to give it a while before it starts to take effect. Within that period before its taking effect, adding in the App ID inDifywill suggest that the App ID is invalid. -
Google recently release the Gemini Pro API and in
Dify, we can also configure it to use the Gemini API. We can go to the settings interface (click on the top right user dropdown and go to the settings panel to further selectModel Provider). Here follows is shown the way to obtain the Gemini API, -
To add in our own knowledge base to train our own chatbot, we can go to the
Knowledgeoption on the top of theDifyadmin page. There, we can import files, or in the future, we can choose toSync from website(currently not available as of Jan-28-2024). Then in our app, we can go to theContextsection and select the knowledge we just created in theKnowledgesection. -
Since some of the GPT API’s may have limitation of tokens, sometimes in our chat app in
Dify, when the context is becoming long, the app may not be able to further respond to our inquiry, in which case we then have to lose the context and create a new chat. -
If we go to the
Overviewsection in our app configuration page – see the image below,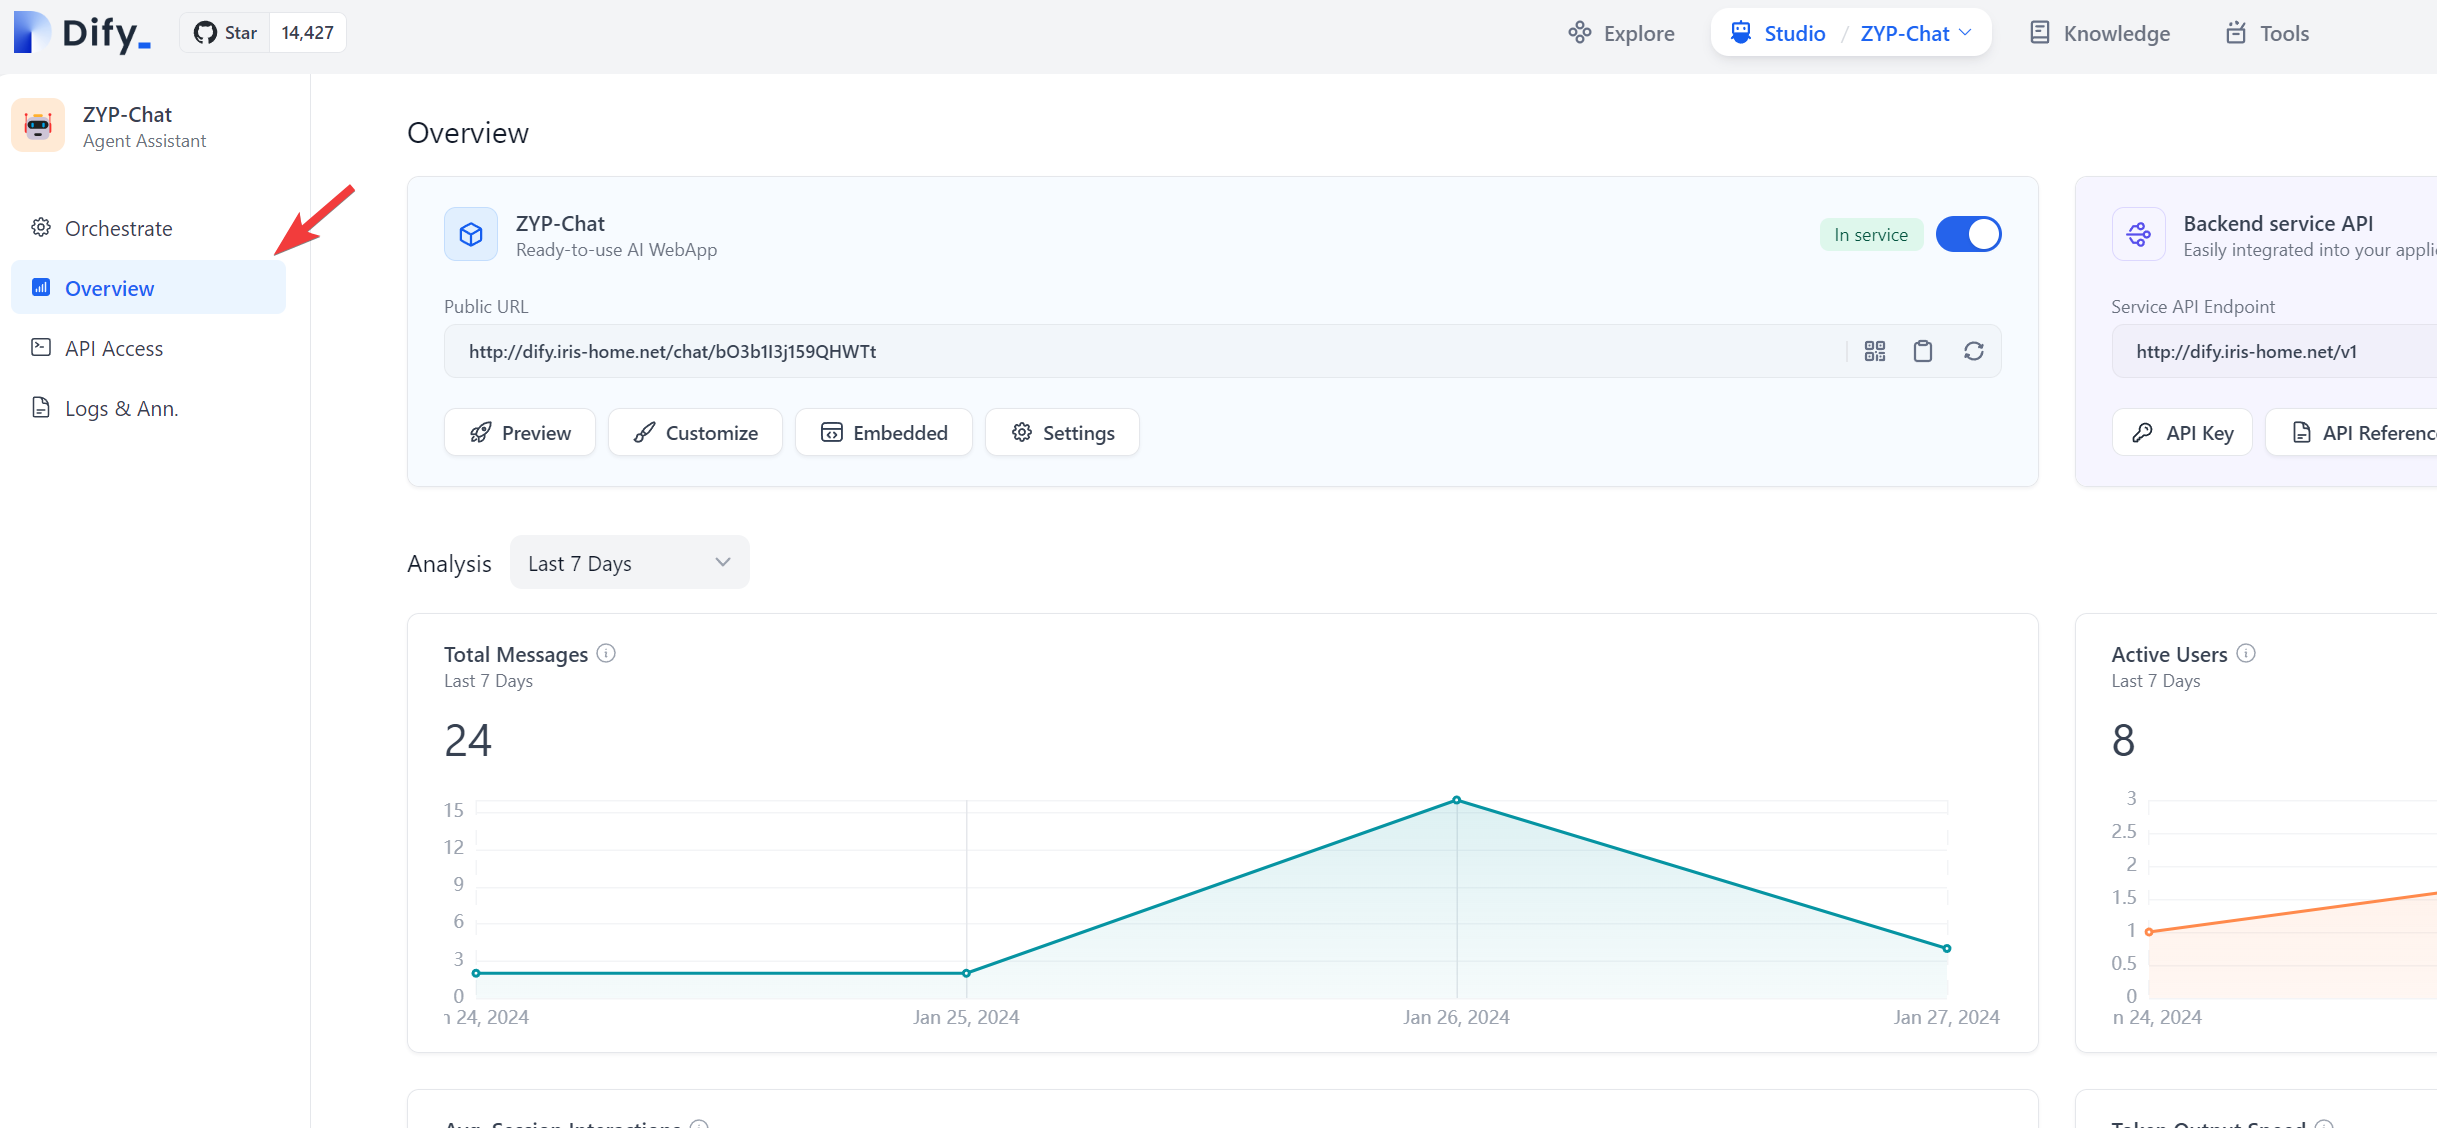
we can further click on the
Embeddedoption just below the public URL of our app and see a few options thatDifyprovides to embed our app in other apps such as our website, or Google Chrome extension. In my case, I was implementing myDifyapp in my personal website constructed using wordpress. In my wordpress, I need to go toSettingsand further go toHead and Footerto populate theDifyapp codes into theHead and footerinjection part.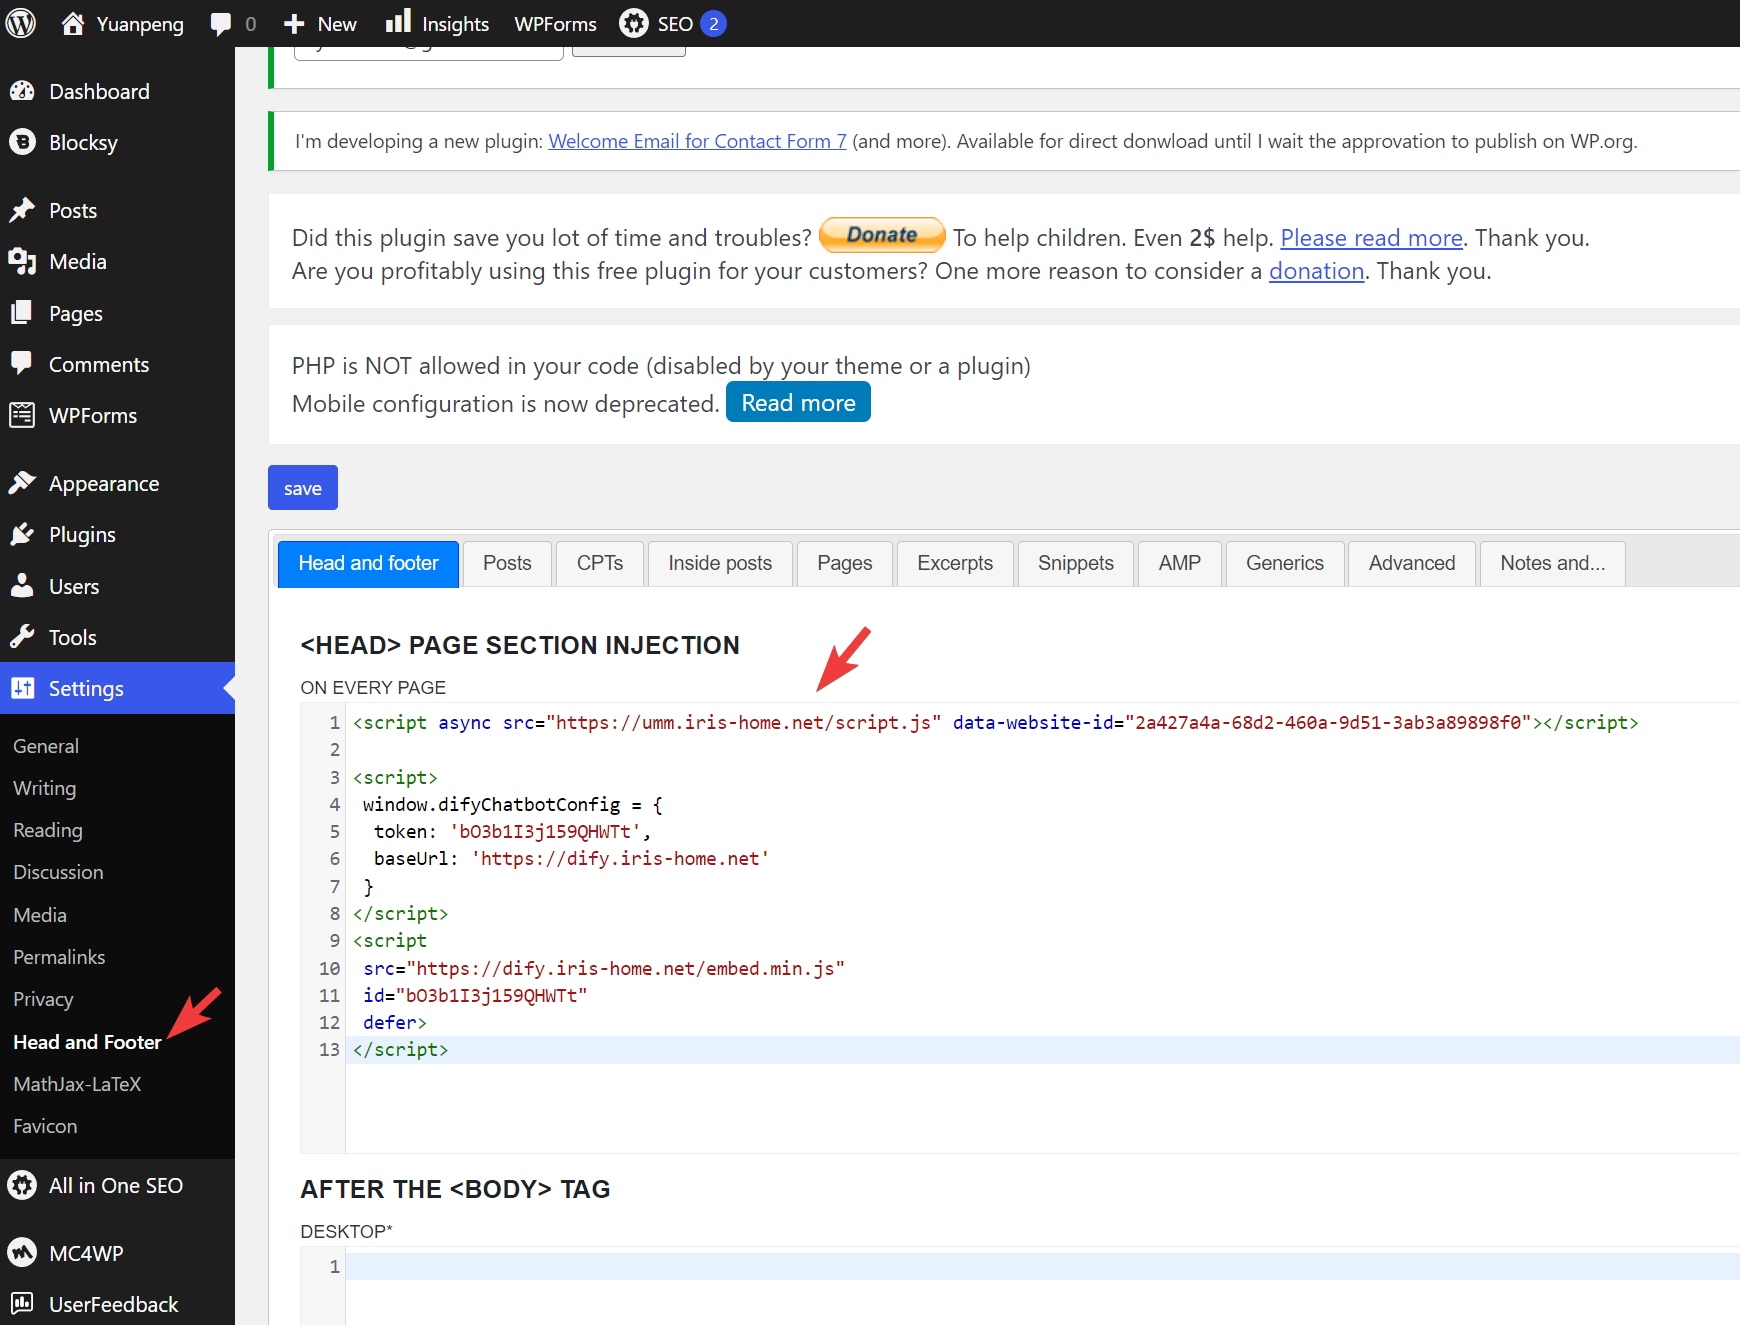
-
To upgrade
Difyto the latest version, we could copy over thedocker-compose.yamlfile from the GitHub repo. We may need to copy over the settings in our old compose file to the downloaded new version. We may want to stop the currently runningDifyservice by runningsudo docker ps -a | grep 'dify'first to grab the container IDs relevant to theDifyservice, followed by runningsudo docker container stop DIFY_CONTAINER_ID_1 DIFY_CONTAINER_ID_2 DIFY_CONTAINER_ID_3andsudo docker container rm DIFY_CONTAINER_ID_1 DIFY_CONTAINER_ID_2 DIFY_CONTAINER_ID_3commands. After that, we then go to the directory where thedocker-compose.yamlfile is located and run thesudo docker compose up -dcommand to start theDifyservice. Be default, there will be another docker containing running to support theDifyservice, namely thenginxdocker container for web hosting. We also need to restart thenginxcontainer. In my case, I only have onenginxcontainer running and it is easy to identify the ID and restart it by runningsudo docker restart NGINX_CONTAINER_ID. If we have multiplenginxcontainers running, for sure, we need to first identify which one is relevant to theDifyservice.